How to use Apple Maps Guides in iOS 14
 William Gallagher
You can make your own Guides or read ones from travel sites
Whether it's your pick of the best bookshops in town, or a travel website's recommendations for 10 restaurants you must visit, Guides in Apple Maps is remarkably useful — if oddly cumbersome to get used to.
One of the Apple Maps frustrations that iOS 13 addressed was how hard it was to plot out multiple locations you wanted to visit. What was first called Collections solved that by letting you build a grouped list of favorites, and now under the new iOS 14 name of Guides, companies can offer you such lists too.
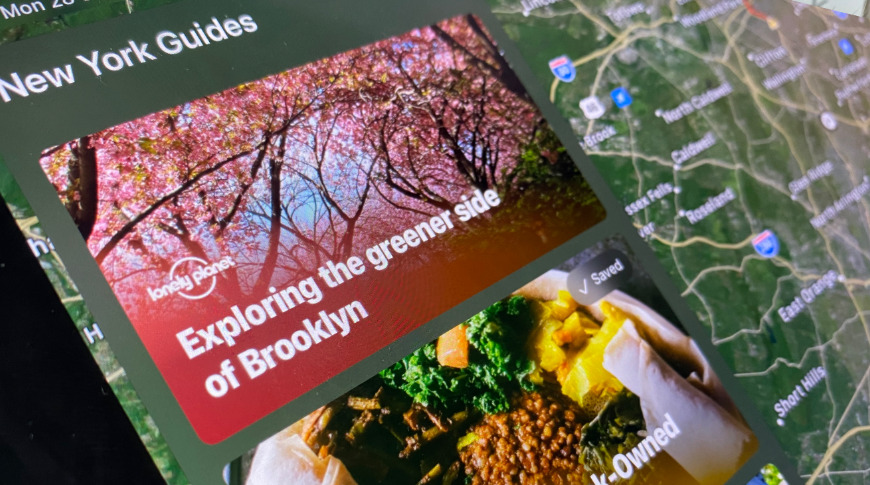
So now when you visit an area in Apple Maps, especially a large US city, you can usually swipe up to get a list of curated Guides. These are ones made by travel websites and so on, and will feature recommendations for tourists, restaurant and the like.
You can also still create your own Guides, though it's not always obvious how you start, how you add places to it — and then what you can do with that Guide afterwards.
How to find and use a curated Guide
- Open Apple Maps
- Search for a popular location such as a large US city
- Scroll down in the panel that appears
- Tap on any of the two or three Guides listed
- Or tap See More
- Choose from the potentially long list of Guides available
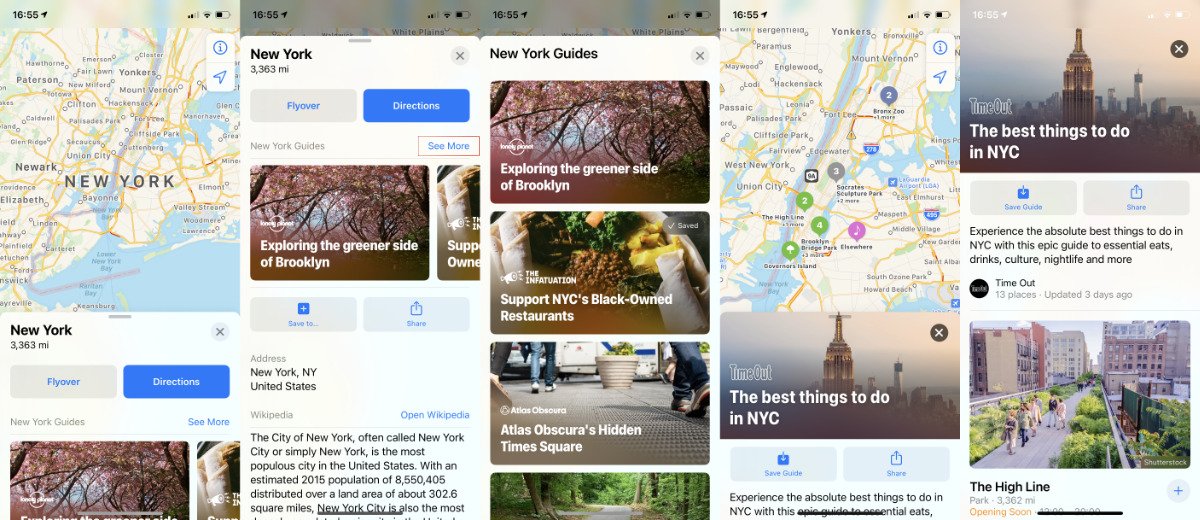
When you tap on a curated Guide, the Map moves to show you a number of highlighted spots around the area. These pins will show icons of what the Guide topic is, such as coffee shops or ice cream.
To use the Guide, you can scroll down to read everything in it, or you can tap on an icon to get directions to that specific place. In most cities, under the Directions button that appears, you'll also see an option to Look Around.
Getting out of the Guide isn't always obvious. You have to tap an X close box which will always be at top right of the Guide's main image, but sometimes with a color that makes it blend into the background.
Also, tapping that X can close the whole Guide section and return you to the regular map. If that happens, swipe down and you'll see recent locations listed. Tap on one of those and you're right back to where the Guides are.
What you can't do is save any other location to that curated Guide. No one but the Guide owner can do that, but on the positive side, the plan is that they will all keep updating for you.
If you want to save a Guide, to effectively bookmark the whole thing for yourself, you need to take several steps.
How to save a curated Guide and view later
- On the Guide page, tap Save Guide
- To view it again, close all other Guides and return to the Map
- On the regular Maps search page, swipe to scroll down
- Find the section headed My Guides
- Tap on See All
That will list all of your saved Guides. If you want to un-save one, go into it and where there was a Save Guide button, there is now a Saved one with a tick. Tap on that to remove the Guide from your list.
How to create your own Guide
- Swipe up on the Map to show the My Guides section
- Tap on See All
- Tap the plus sign at bottom right
- Name your Guide
- Tap Create
Now you just need to add places to this new, empty guide. To do that, find a place and save it.

- Search for the place you want
- Swipe up to reveal more details about it
- Tap on the Save To icon under the photos of the place
- Scroll to your guide and tap on it
This place is now in your own Guide. It's handiest to make the Guide first and then go through adding places to it, but you can begin with the location instead. When you get the Save To button and a list of guides, you can choose New Guide.
What you can do with Guides
The chief convenience of Guides is for you, so that you have multiple places in one list. That might be all the nearby filming locations you want to visit on your vacation, or all the rental properties you're looking at in your area.
You can, though, let other people benefit from your Guide. Create a good guide, and then you can share it with friends and colleagues.
How to share a Guide
- Open the Guide, whether it's yours or a curated one
- Swipe up to reveal more details
- Tap on the Share button that appears at the bottom
This is a one-time kind of sharing. You're not giving the pair of you access to the same list so that you can each update it, you're instead just sending them the list as it is now.
For something so useful, so long awaited, and ultimately also so simple, Guides are oddly tricky to get used to. Once you have, though, you will wonder how we managed without them.
Keep up with AppleInsider by downloading the AppleInsider app for iOS, and follow us on YouTube, Twitter @appleinsider and Facebook for live, late-breaking coverage. You can also check out our official Instagram account for exclusive photos.


 Malcolm Owen
 William Gallagher and Mike Wuerthele
 Christine McKee


 Marko Zivkovic