

By Jason Snell
October 21, 2020 3:43 PM PT
Command Performance: Screen shots everywhere

I used to think that screen shots1, images captured from a computer screen, were only for tech journalist types like me. But is there any clearer example of the public hijacking a computer feature originally intended for a very nerdy purpose than the preponderance of screen shots from Notes used to make announcements on social media?
The fact is, there are plenty of reasons for people to take screen shots. Not everything needs to be composited carefully in a graphics program. On social media or in an email, a quick screen shot of a portion of a spreadsheet can provide perfect clarity. Bad Tweets are frequently screenshotted before they can be deleted by the person who sent them. The list goes on.
In the past few years, on both macOS and iOS, Apple has seriously improved its built-in screen shot features, and I use them all the time. You do too, and if you don’t, maybe you’ll consider it when you’re making your next big announcement and/or apology to Twitter.
macOS screen shots
The basics have been there from time immemorial: Command-Shift-3 takes an image of your screen and saves it to your default screen-capture folder. (Trivia: Command-Shift-1 and Command-Shift-2 were reserved as shortcuts to eject the first and second floppy disk on early Macs.)
Command-Shift-4 lets you select a portion of the screen to be captured. The most common way to do this is to use the crosshairs to drag out the area you want to be captured. If you drag out a box and discover it’s not aligned quite right, don’t give up—if you hold down the space bar, you can drag the box around. Then release it to resume adjusting the size of the box.2
But the crosshairs aren’t the only kind of capture you can do from that mode. Tap the spacebar and click a window to capture just that window. (And if you hold down the option key while clicking, the capture won’t include a drop shadow.)
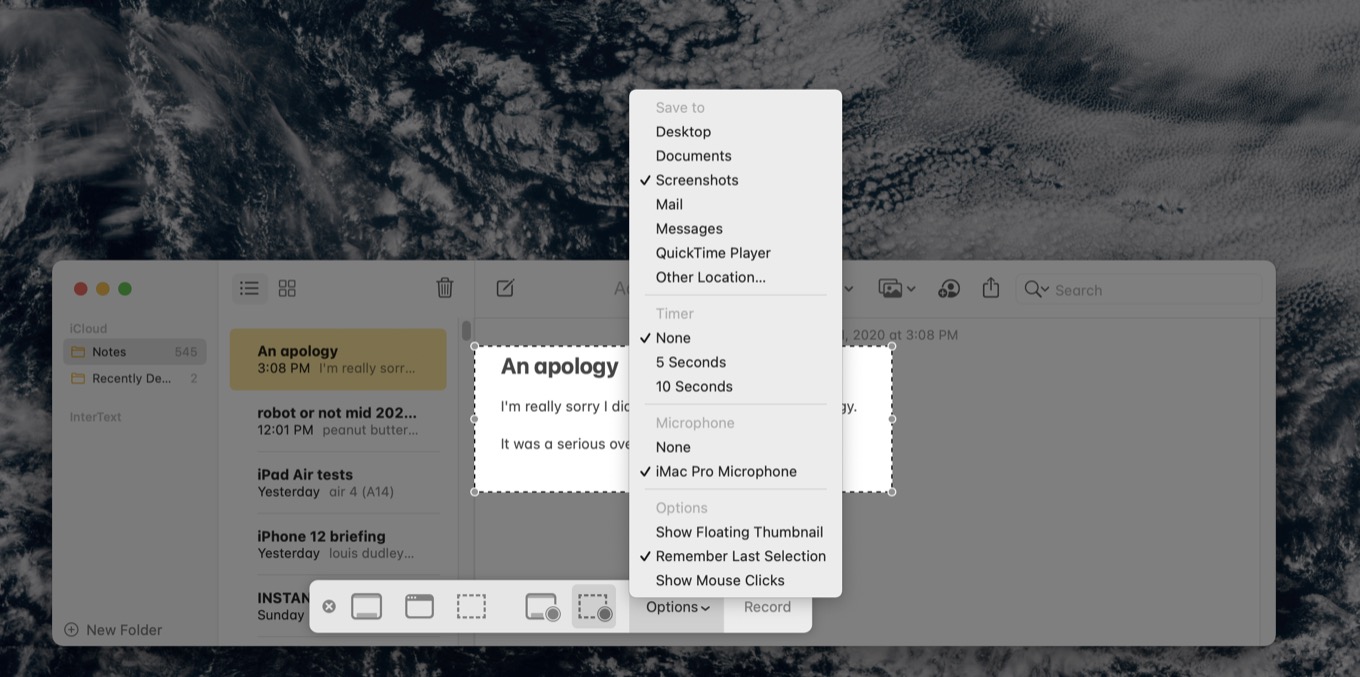
Command-Shift-5 opens the Screen Shot app, introduced in Mojave. A floating palette lets you choose from all sorts of options, including still and video screen captures. This is also the easiest way to set the default location for all your screen captures. (I store all my screen captures in Dropbox so I have access to them on all my devices.)
iOS screen shots

On iOS, screen shot functionality has been slow in coming. The first few versions of the iPhone OS didn’t even offer screen shots as functionality! To get early screen shots for use in issues of Macworld, we had to jailbreak the original iPhone, connect to it via the Terminal, issue a shell command at the moment we wanted to take a screen shot, and then transfer the resulting file off the iPhone via another shell app. Bananas.
Apple finally got with the program and added a two-button shortcut for screen shots, which varies by device. (On most modern devices it’s the upper volume button and the sleep/wake button—and if you’ve got a keyboard, yes, you can type Command-Shift-3.) It used to be that the screen shot would just be placed in your camera roll, but in recent OS versions, a floating thumbnail of the screen shot appears after you take it—and if you tap on the screen shot, you’ll enter iOS’s screen shot editor. (If you type command-shift-4 on an iPad keyboard, you’ll automatically be brought into this mode.)
This mode is great, because I rarely want to capture my entire screen. From here, you can quickly crop or mark up your image, and then choose what you want to do with it. You can then tap Done and will be prompted to save it to your Photos library, save it as a file in the Files app, or discard it. You can also turn to the Share icon and share it directly with another app, which is what I usually do. When I’m wanting to share a screen shot on Twitter or in Slack, I take the shot, crop it, tap the Share icon, and choose Copy to place it on the clipboard. Then I discard the screen shot—I don’t actually want to save it for posterity—and paste it from the clipboard to wherever I want it to go.
If you want to capture video on iOS, that’s a different path. The best way to do this is to add the Screen Recording icon to Control Center. Then you can swipe down and tap it to begin a recording. When you’re done, tap the red recording icon in the top bar and it’ll be saved to your Photos library.
Now consider yourself prepared for your next Twitter announcement! Or anything else that can be better communicated by doing the digital equivalent of pointing at your screen and saying, “hey, look at this.”