
When Apple announced iCloud+ at WWDC 2021, it revealed that paid iCloud tiers would receive additional perks such as support for Private Relay, and Hide My Email. Another perk included with iCloud+ is the ability to set up an iCloud Mail custom email domain.
The new custom email feature, which is currently in beta, has been something that iCloud Mail users like myself have been wanting for years. In this hands-on walkthrough, I show you how to set it up.
Why use a custom email domain?
There are several reasons why you’d want to choose a custom domain for email. For starters, if you have a business, it can make your business seem more legitimate. More importantly, custom email domains allow you to “own” your email address, affording portability that allows you to move it between email hosts. If an email host shuts down, or their business practices no longer align with mine, I can move it to any host of my choosing whenever I want. I could even host it myself if I wanted to, but that’s a tutorial for another day.
Video: How to set up an iCloud Mail custom email domain
Subscribe to 9to5mac on YouTube for more videos
A few things to keep in mind
First and foremost, custom email domains for iCloud Mail is still a beta feature, and hence, is only available via beta.icloud.com at the moment. With this in mind, I don’t recommend hosting your custom domain with iCloud Mail for very important email addresses or mission-critical work. Keep in mind that these are just Apple’s recommended settings. Advanced users may have their own specific DNS record settings based on their needs.
iCloud hosted email is also limited to just five domains, and there is currently no wildcard support. In other words, you cannot yet set up a catch-all for emails sent to addresses that are not yet set up.
Guide: How to set up an iCloud Mail custom email domain
The first thing you’ll need to do before setting up a custom email domain is to own a custom domain. If you already have a domain, you’re already one step ahead of the game. If you don’t already own a domain, it’s super easy to purchase one using a domain registrar. I’ve been using Hover for years, and I highly recommend it, but you can use your registrar of choice.
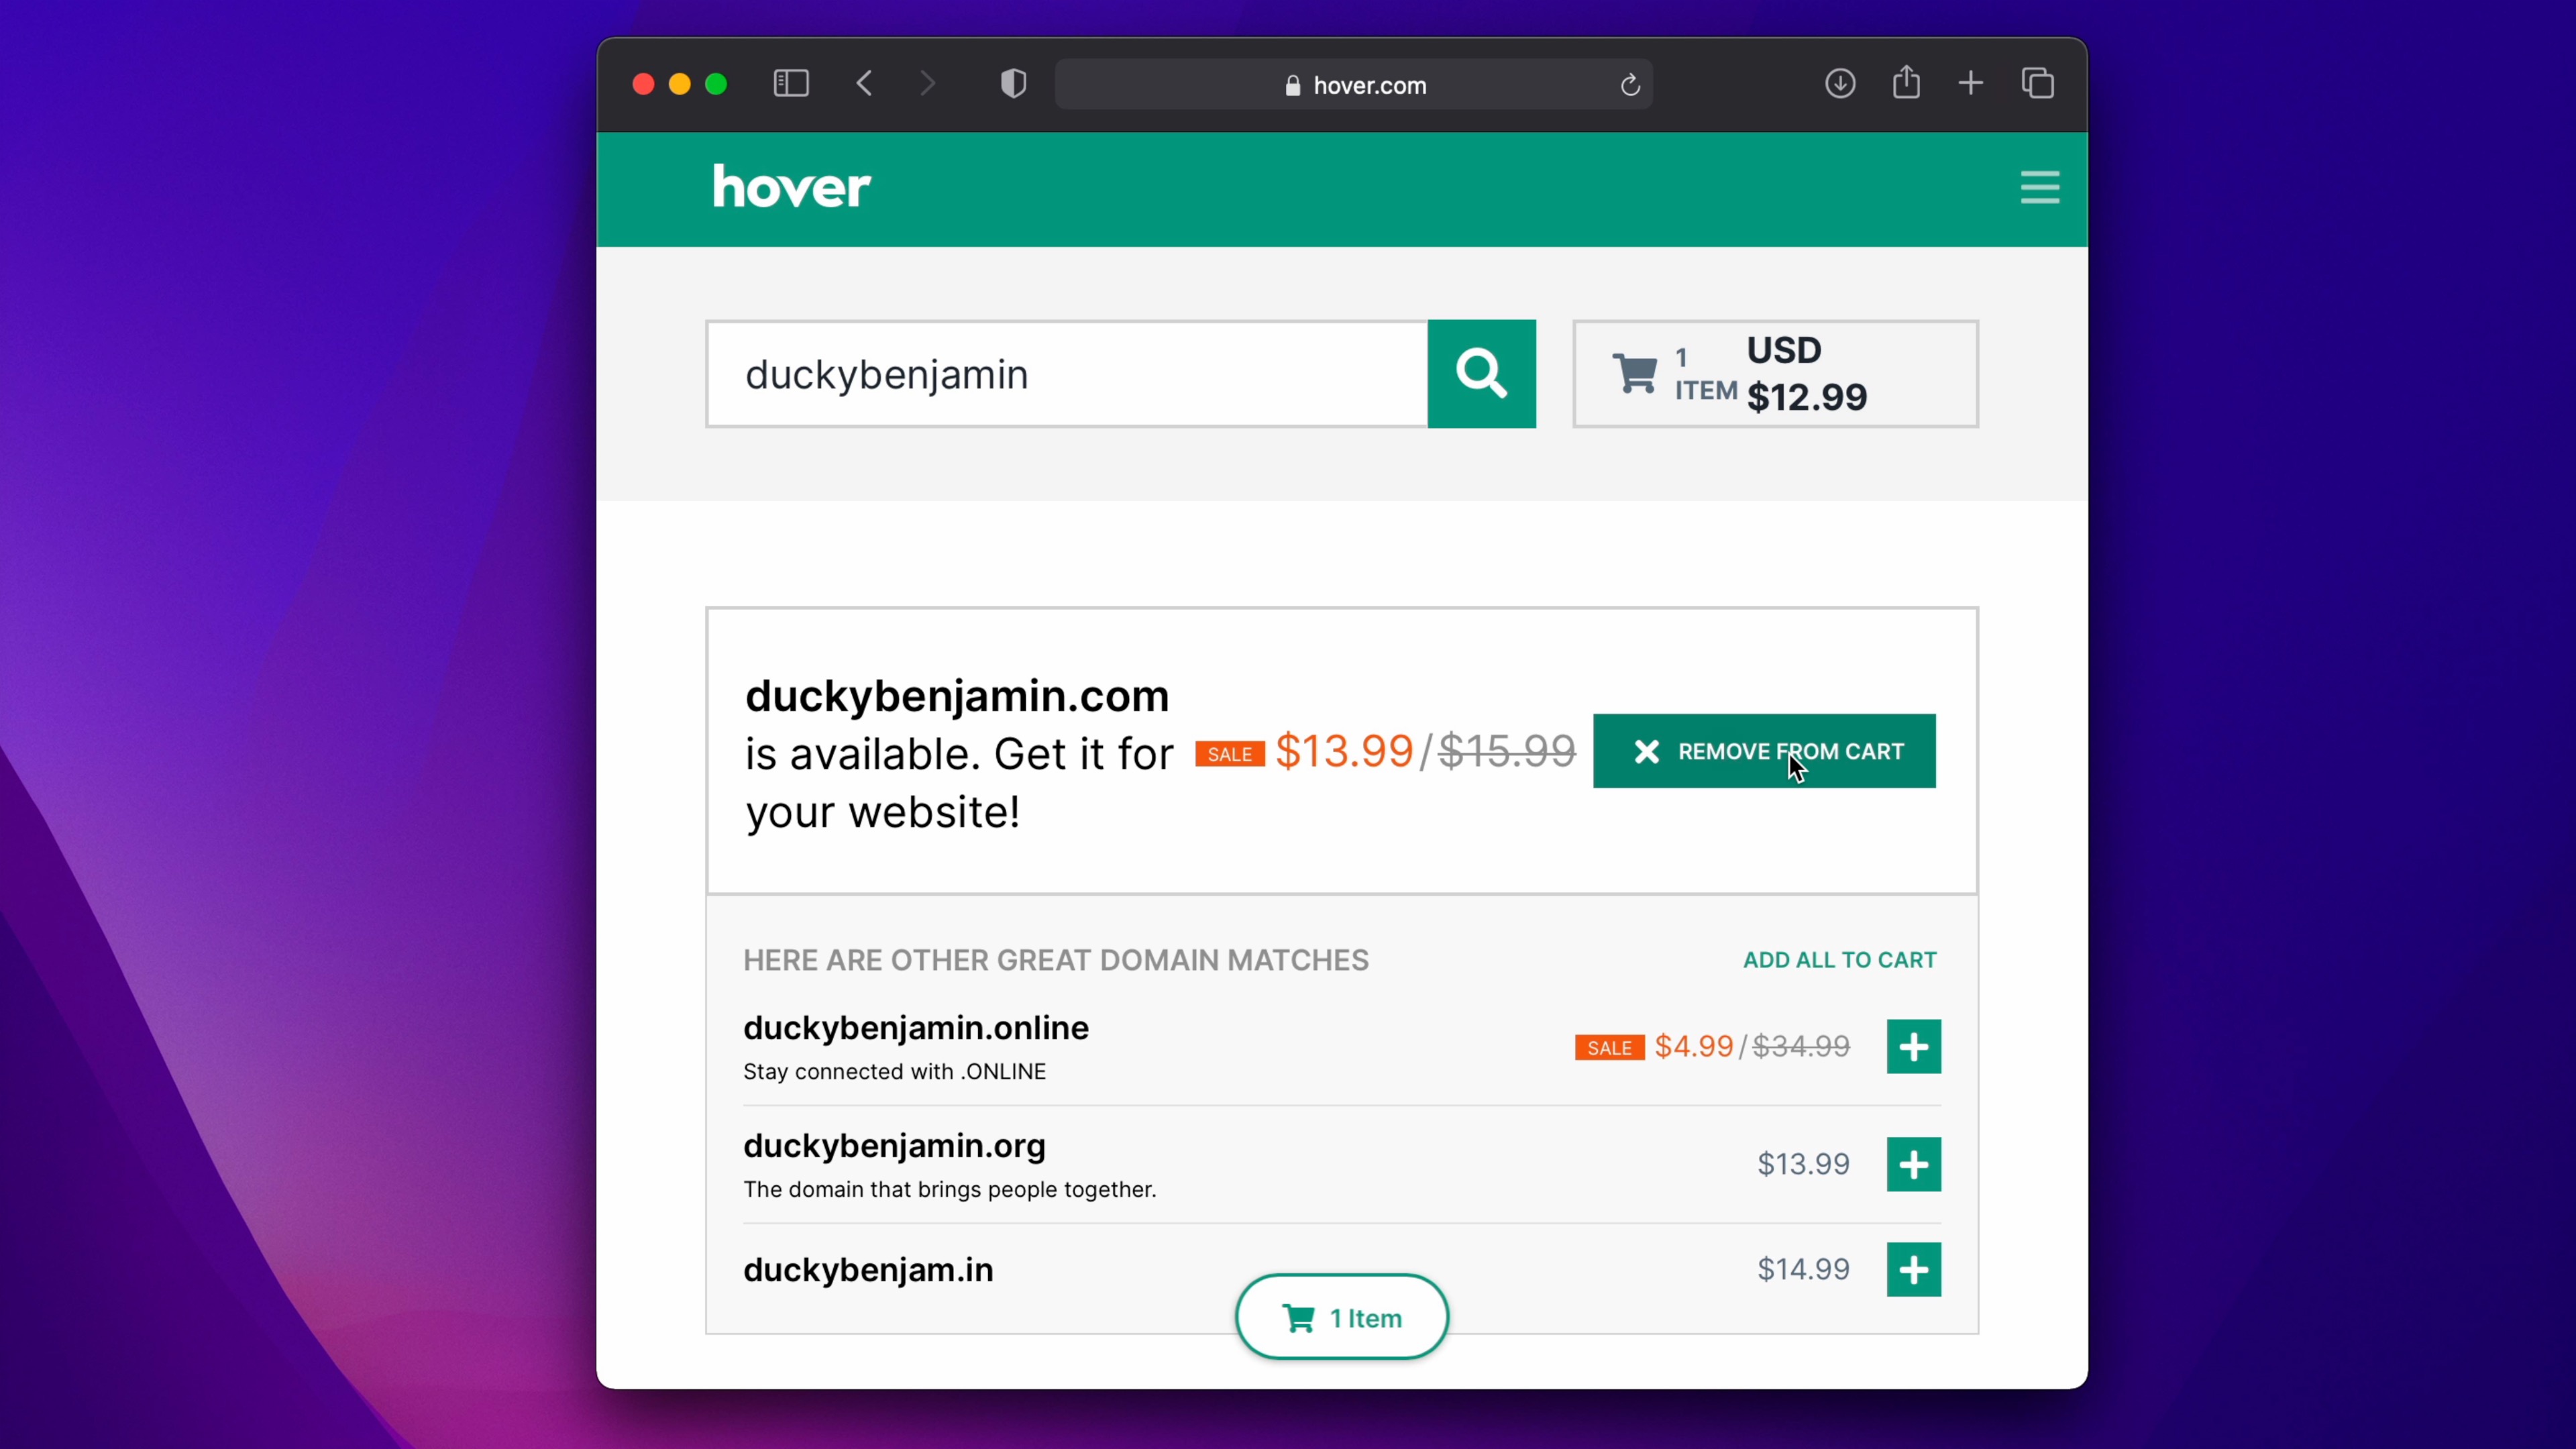
Setting up a new domain with Hover
Once you have a custom domain, you can proceed to set up your iCloud email with your custom domain.
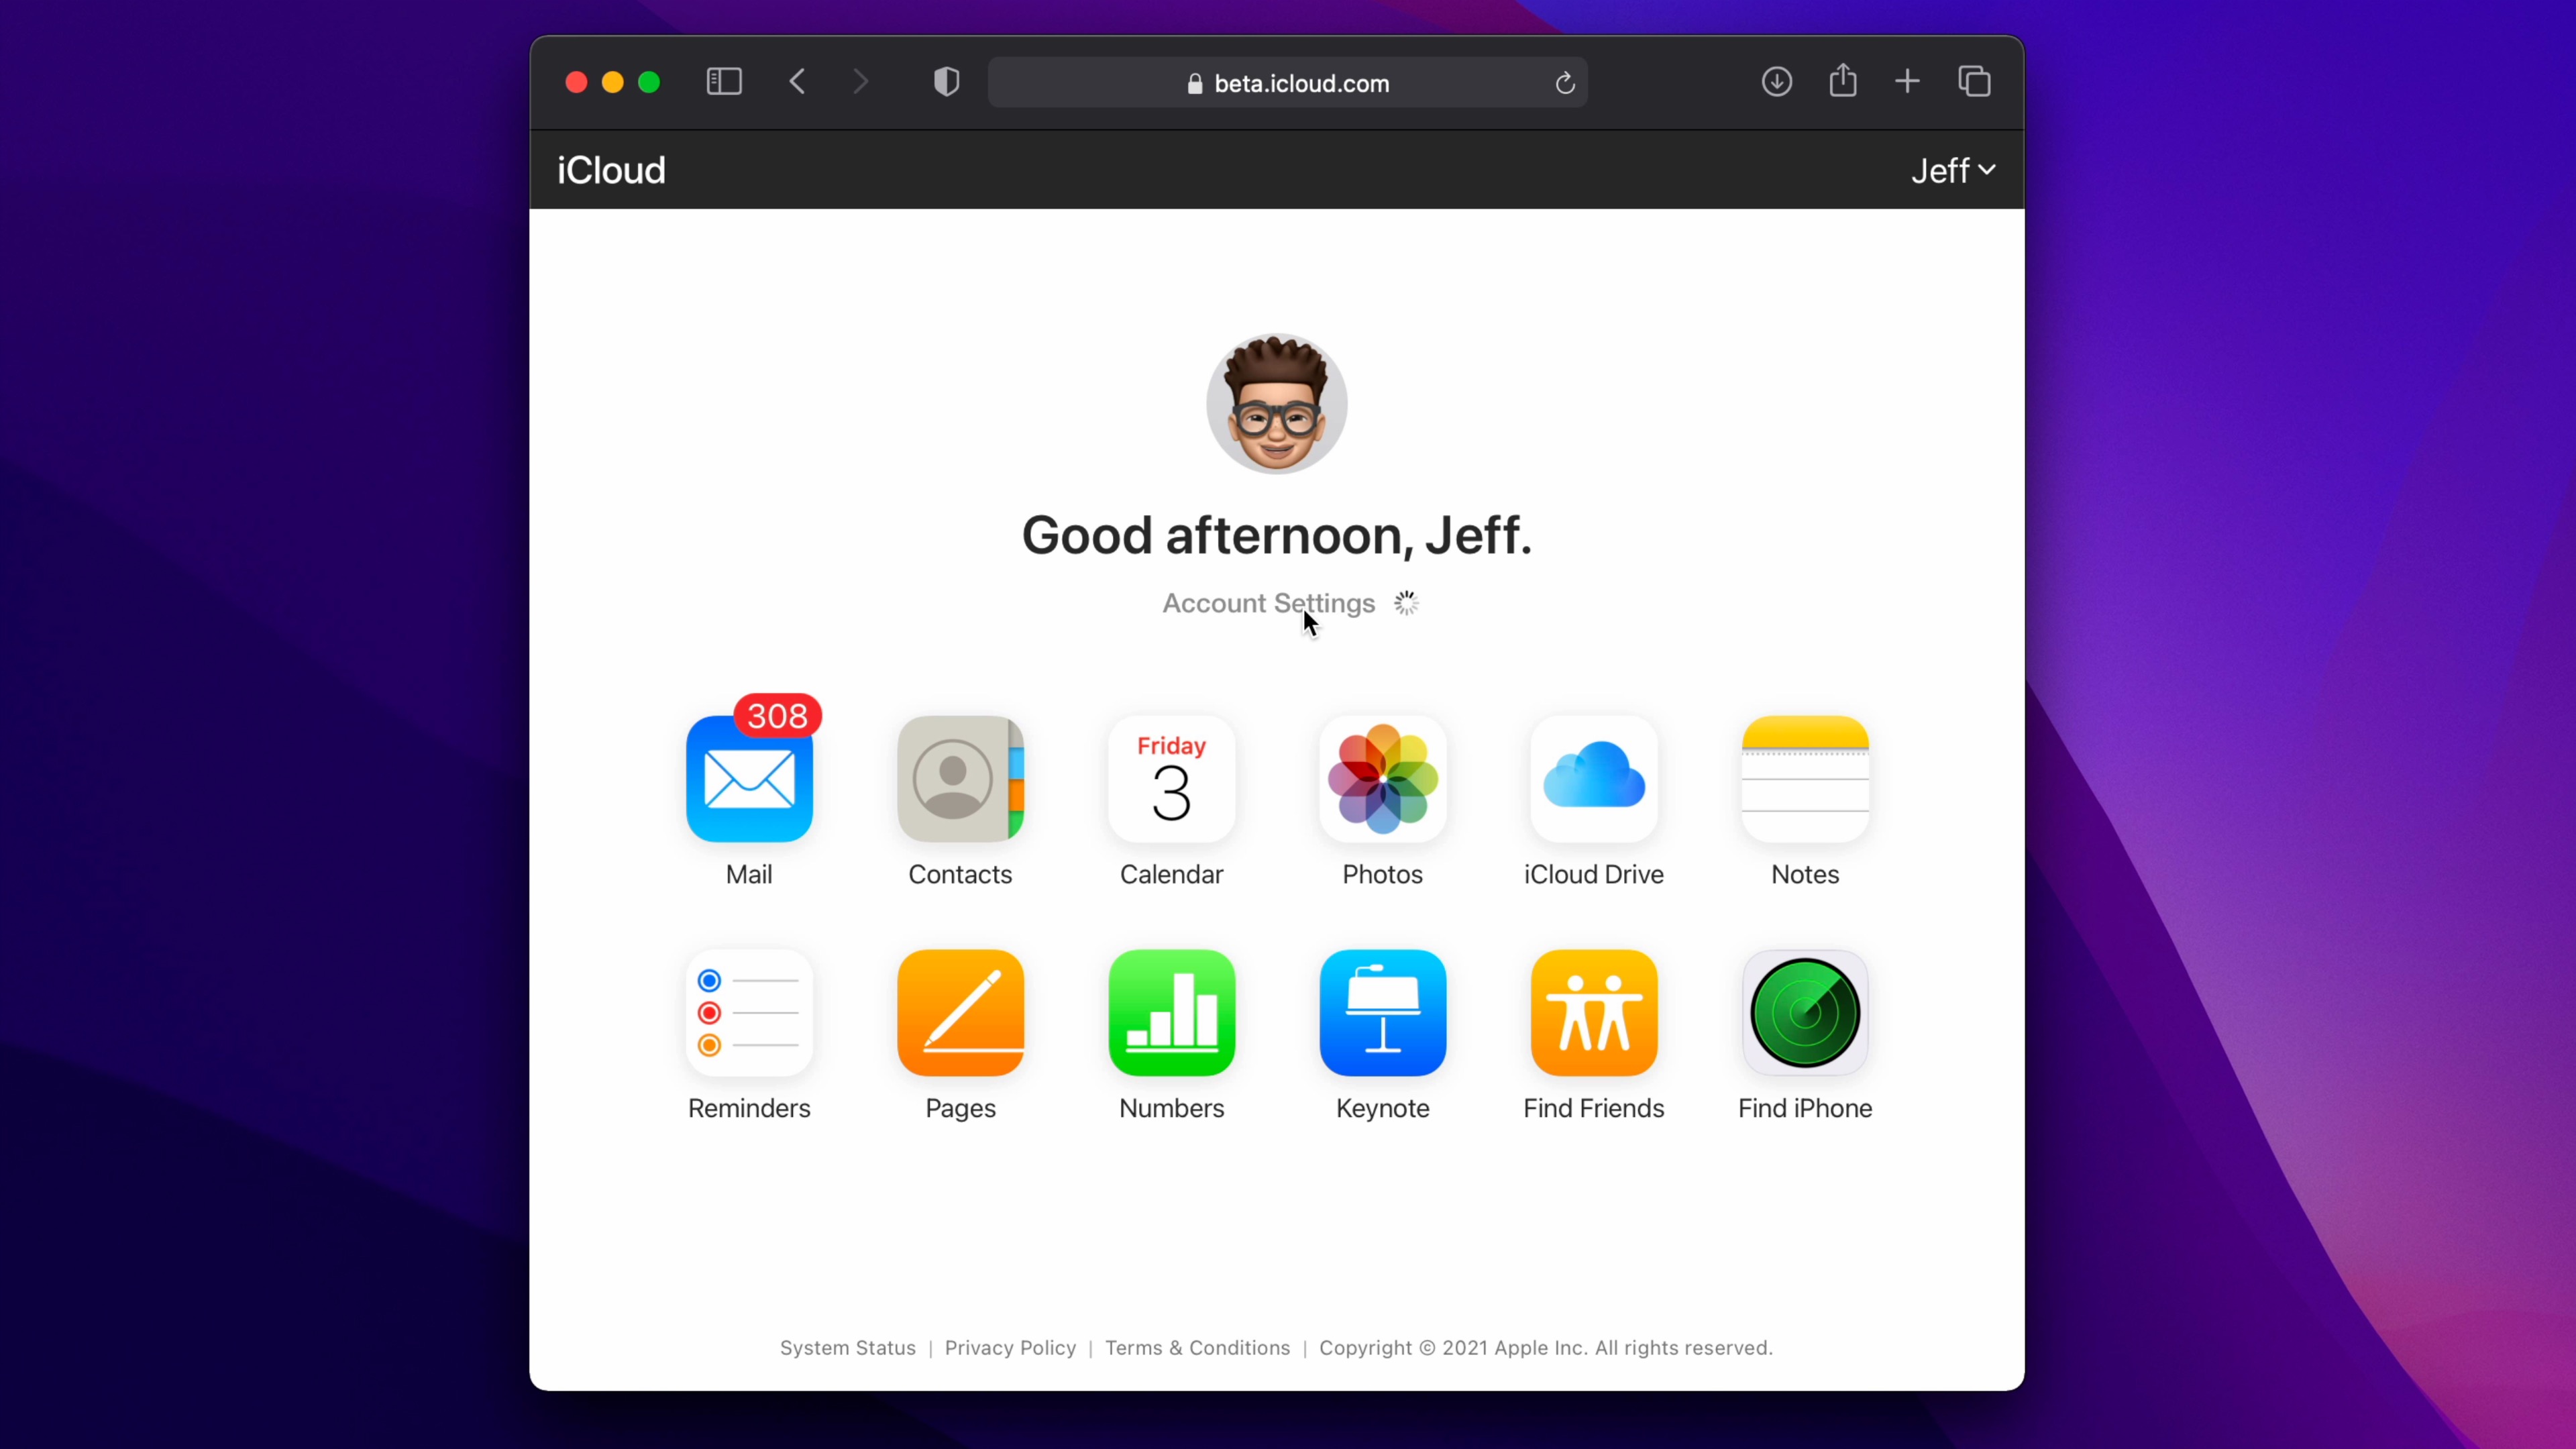
Step 1: Log in to beta.icloud.com
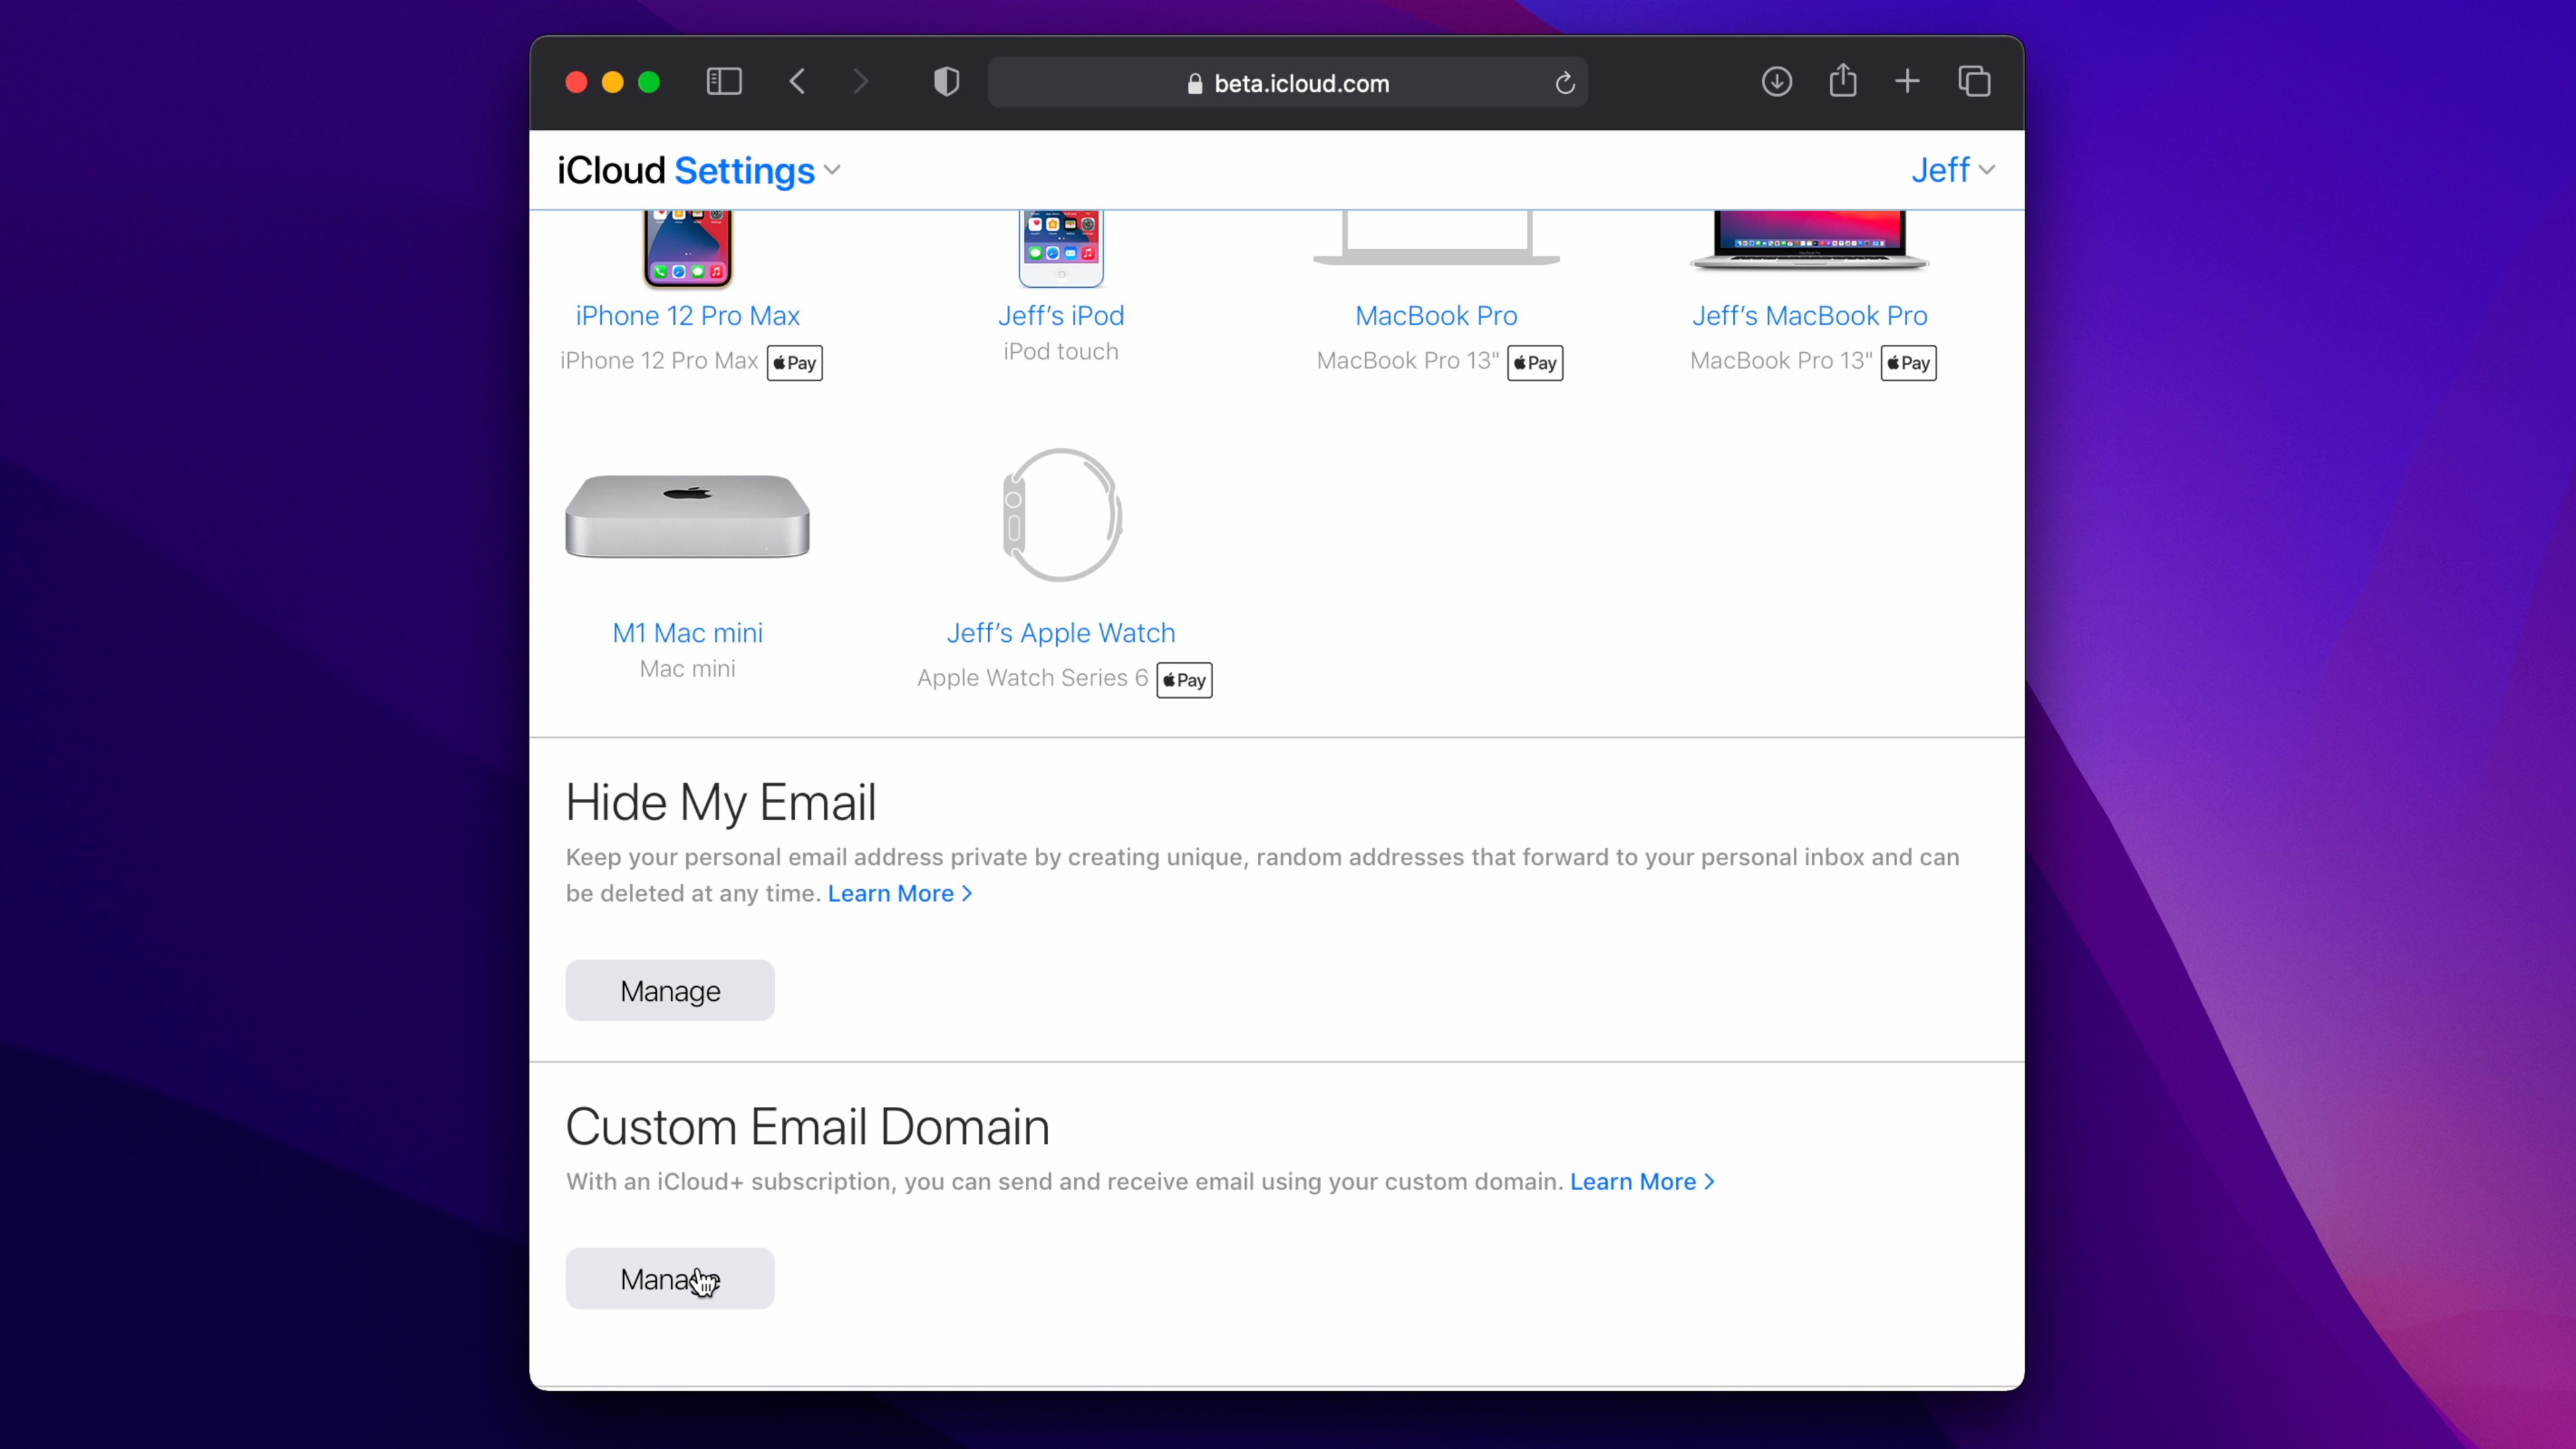
Step 2: Scroll down until you see Custom Email Domain. Click the Manage button.
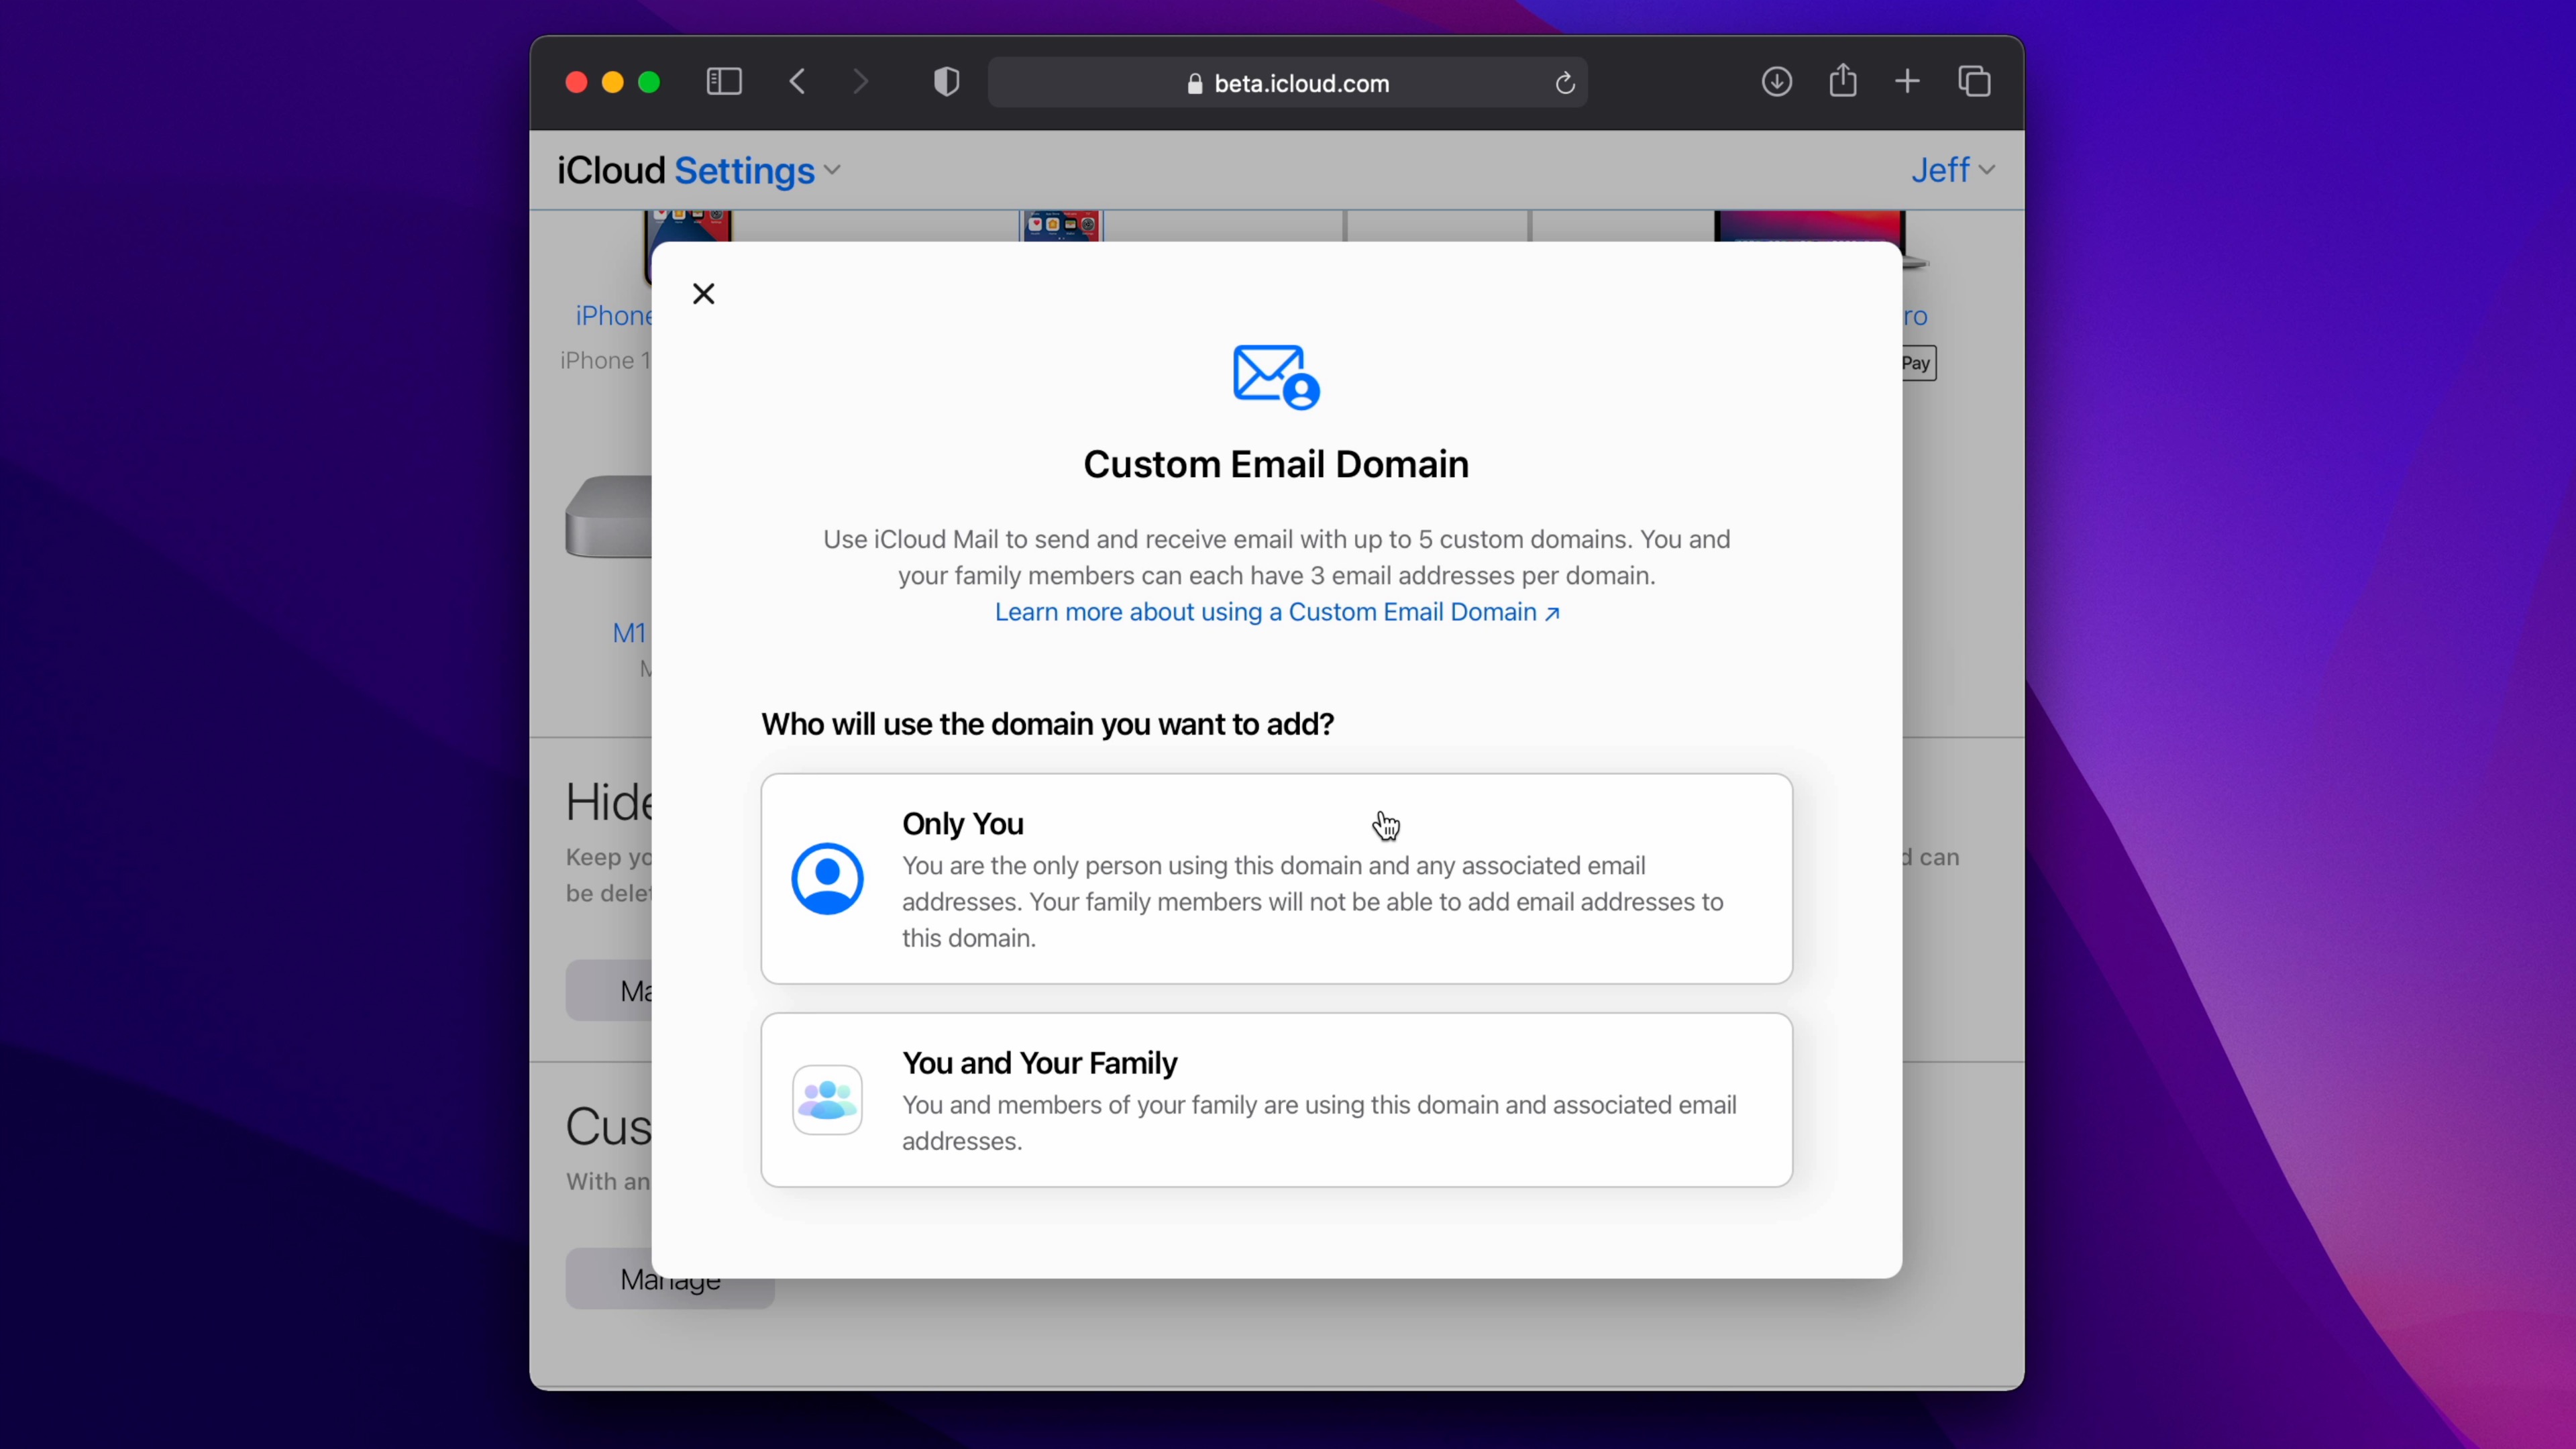
Step 3: On the Custom Email Domain page, select who will use the domain that you want to add. Choose Only You if you will be the only person using the domain and any associated email addresses. If you’d like to give family members access to use the domain and associated email addresses select You and your Family. In this tutorial, we’ll be following the Only You path, but the differences are few.
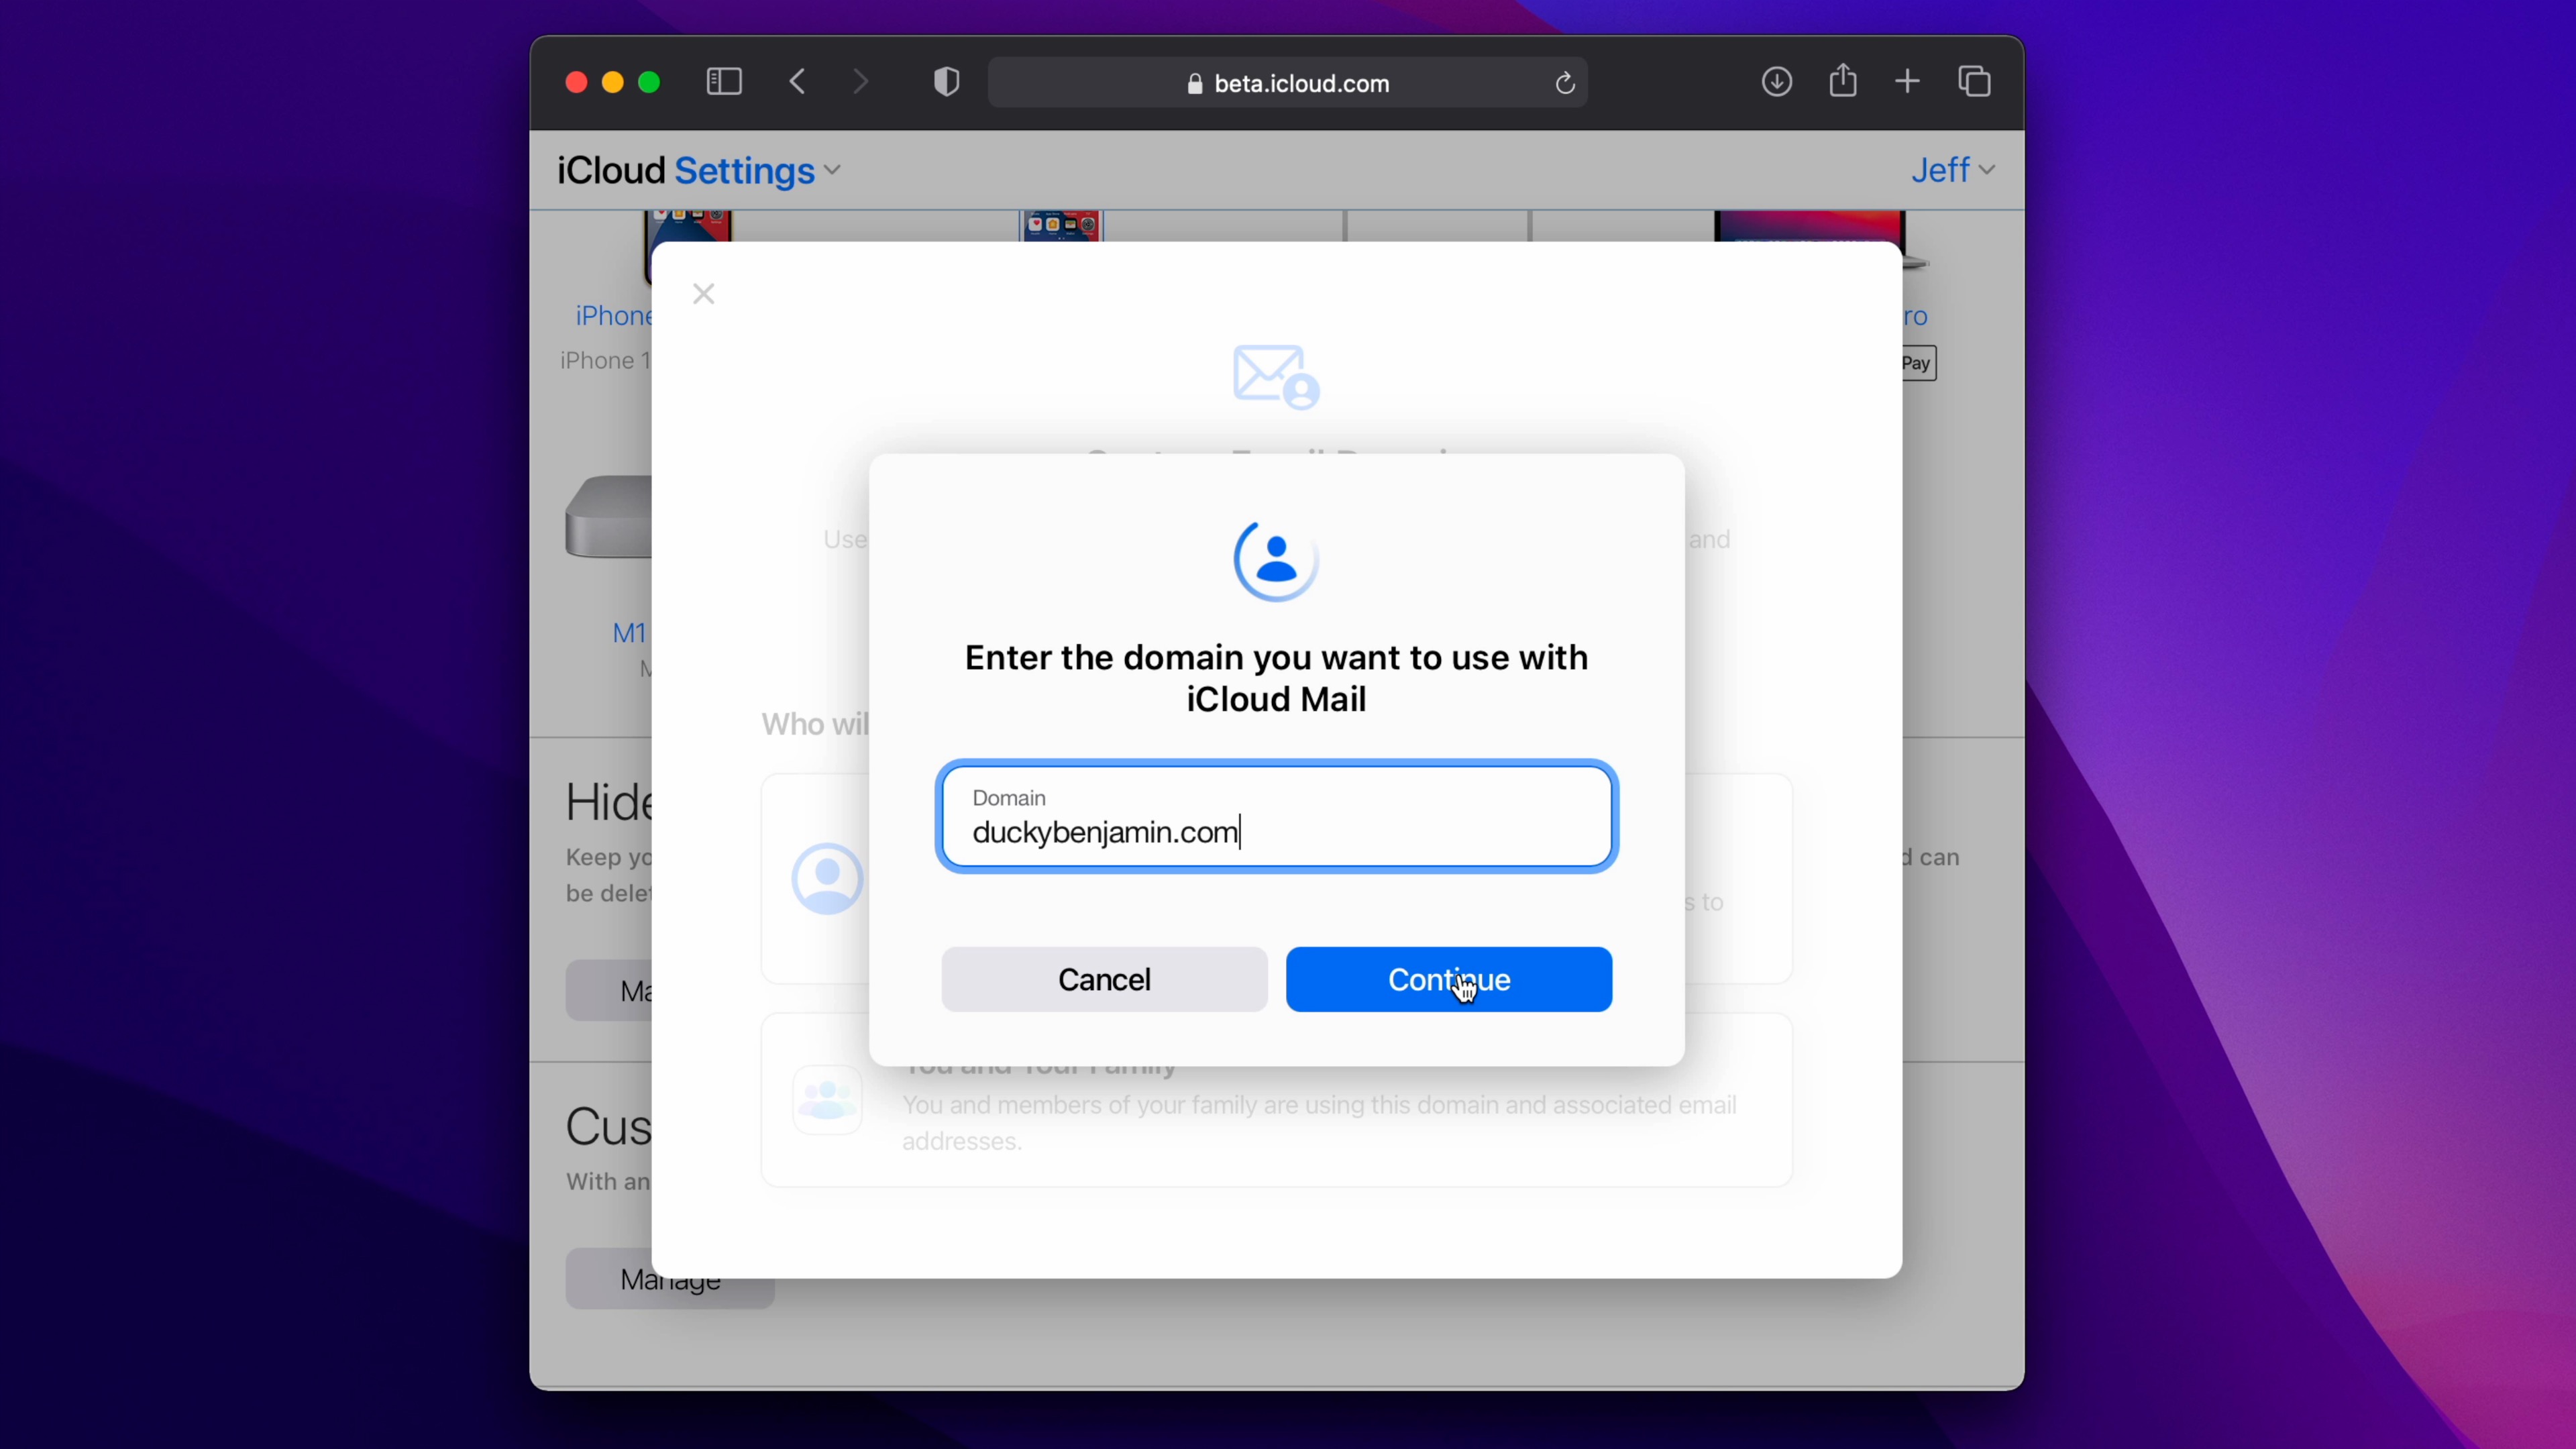
Step 4: Enter the domain that you want to use with iCloud Mail and click Continue. In this tutorial example, I’m using duckybenjamin.com, which I purchased from Hover specifically for this tutorial.
Step 5: Since this guide shows you how to set up iCloud Mail with a new custom domain. Click skip on the section for Add existing email addresses, we’ll come back and add email addresses to the domain later.
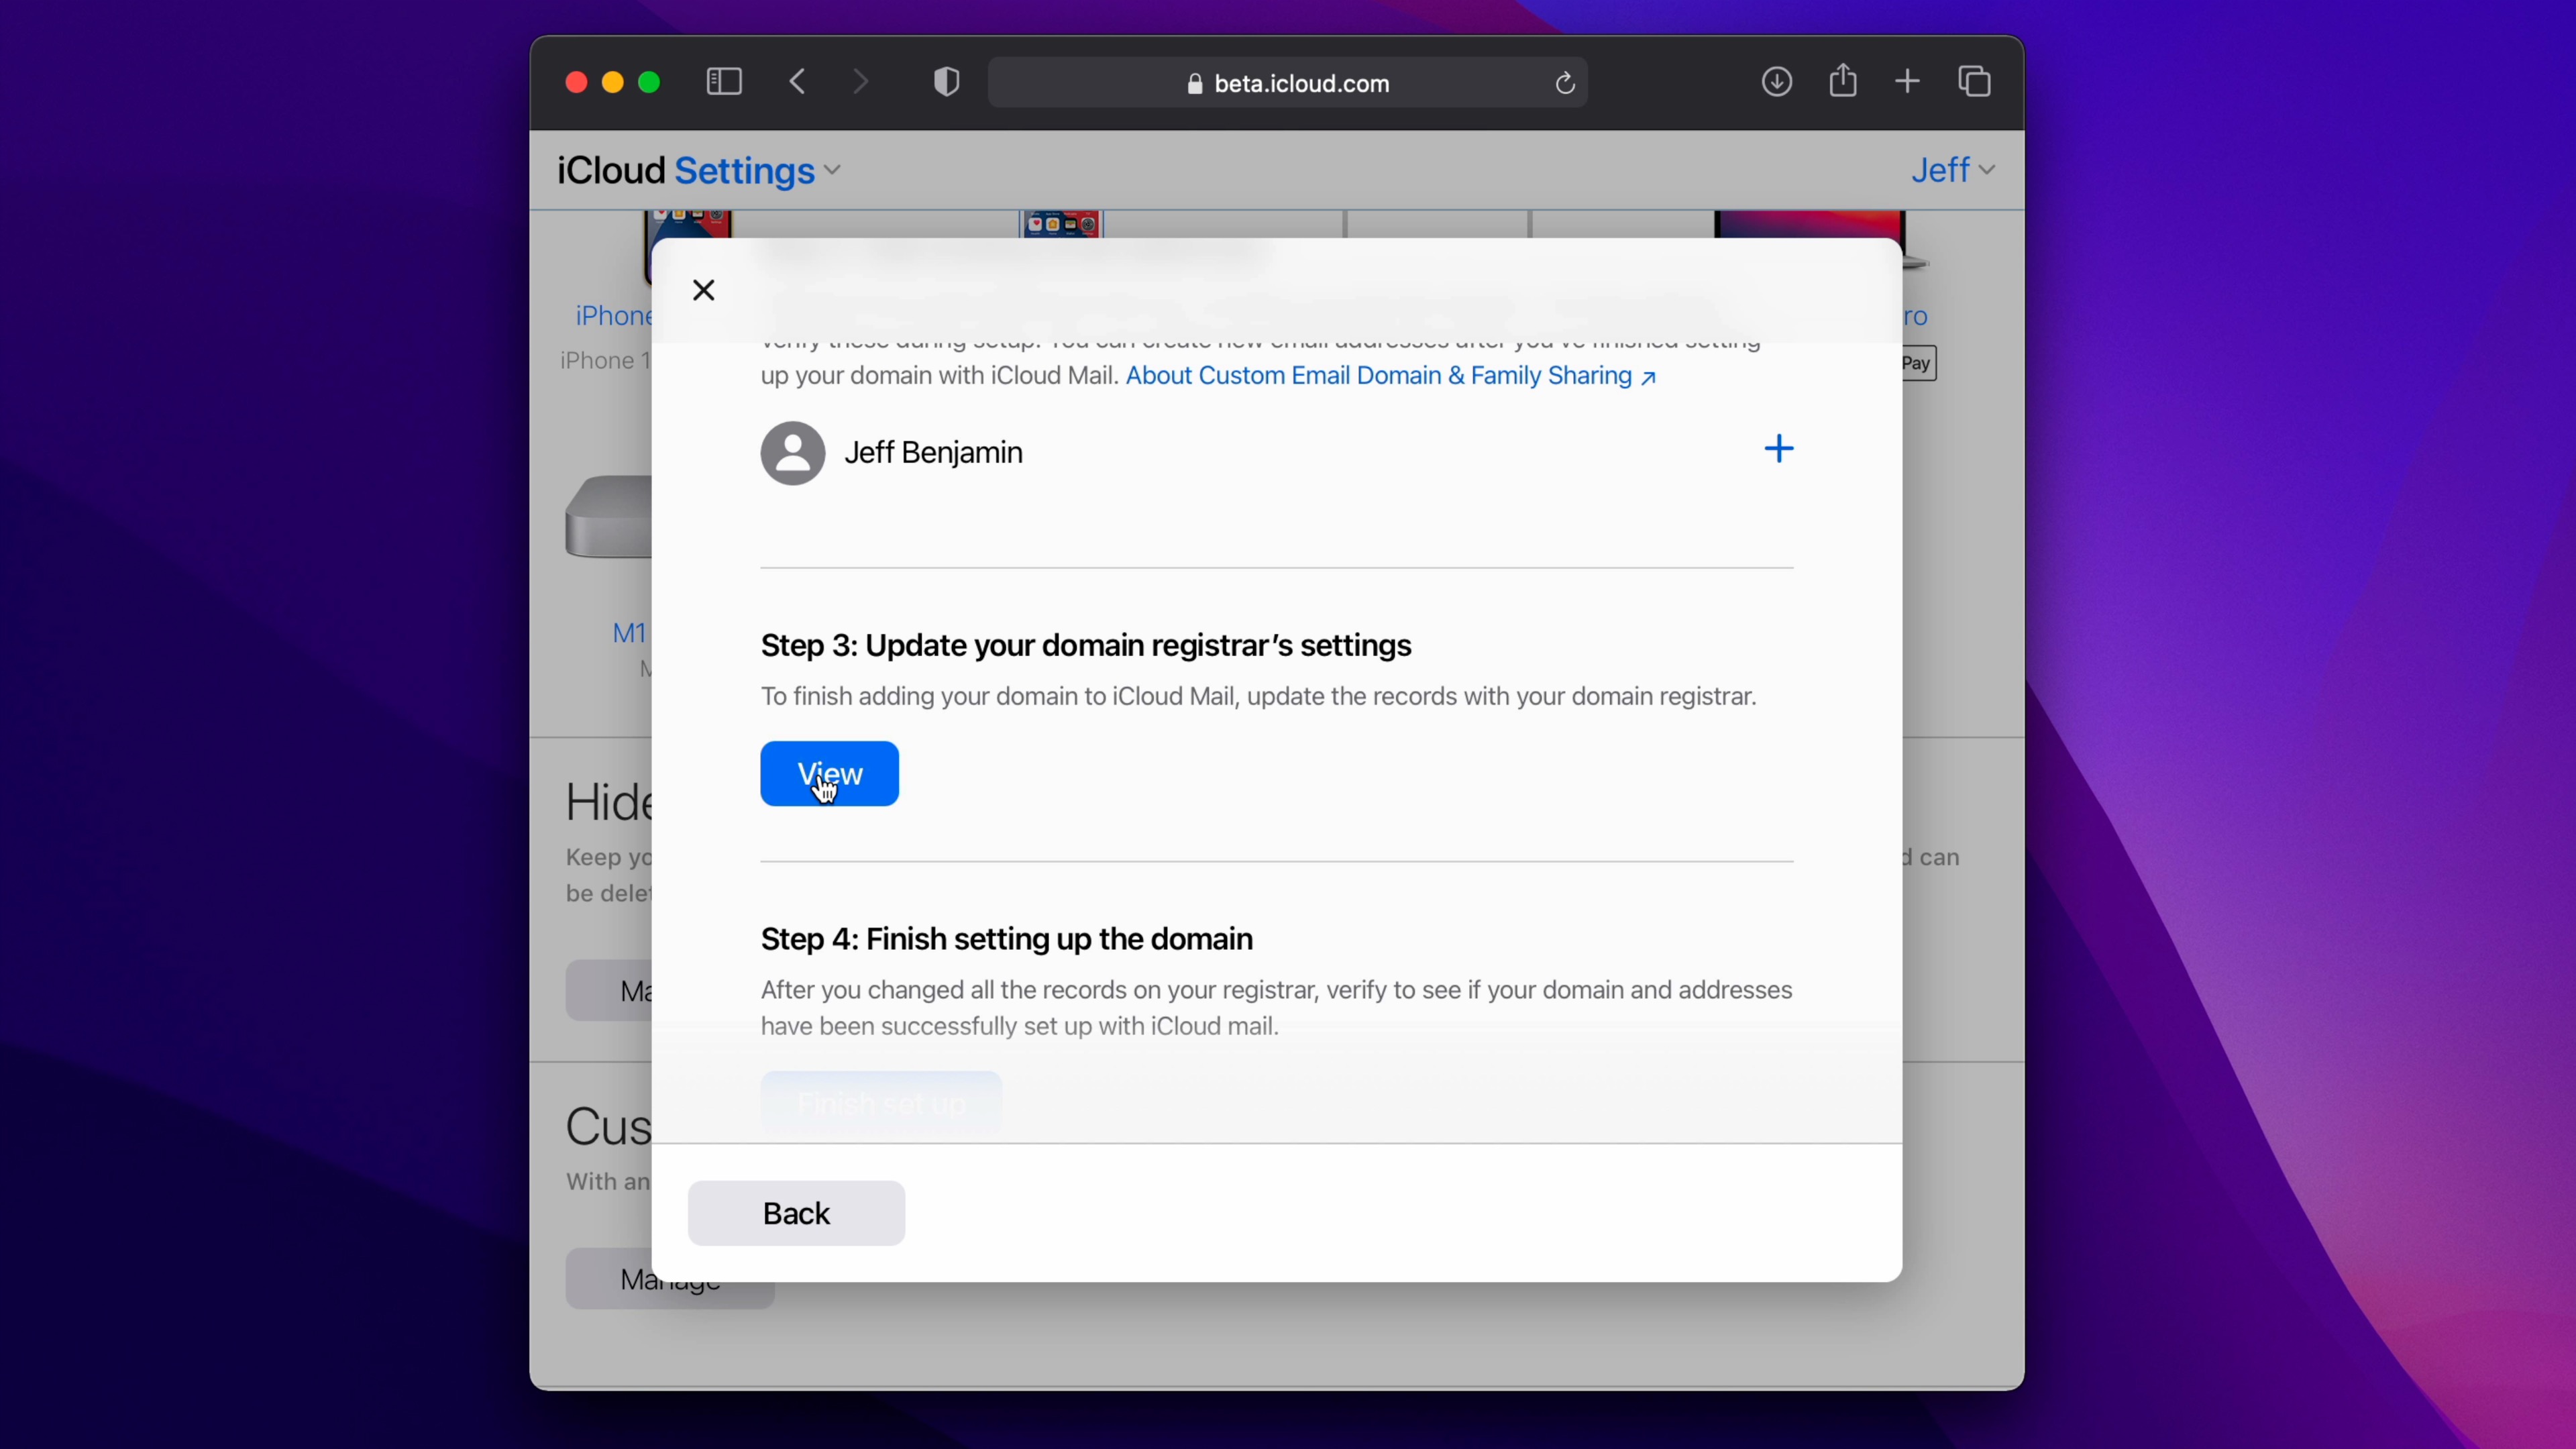
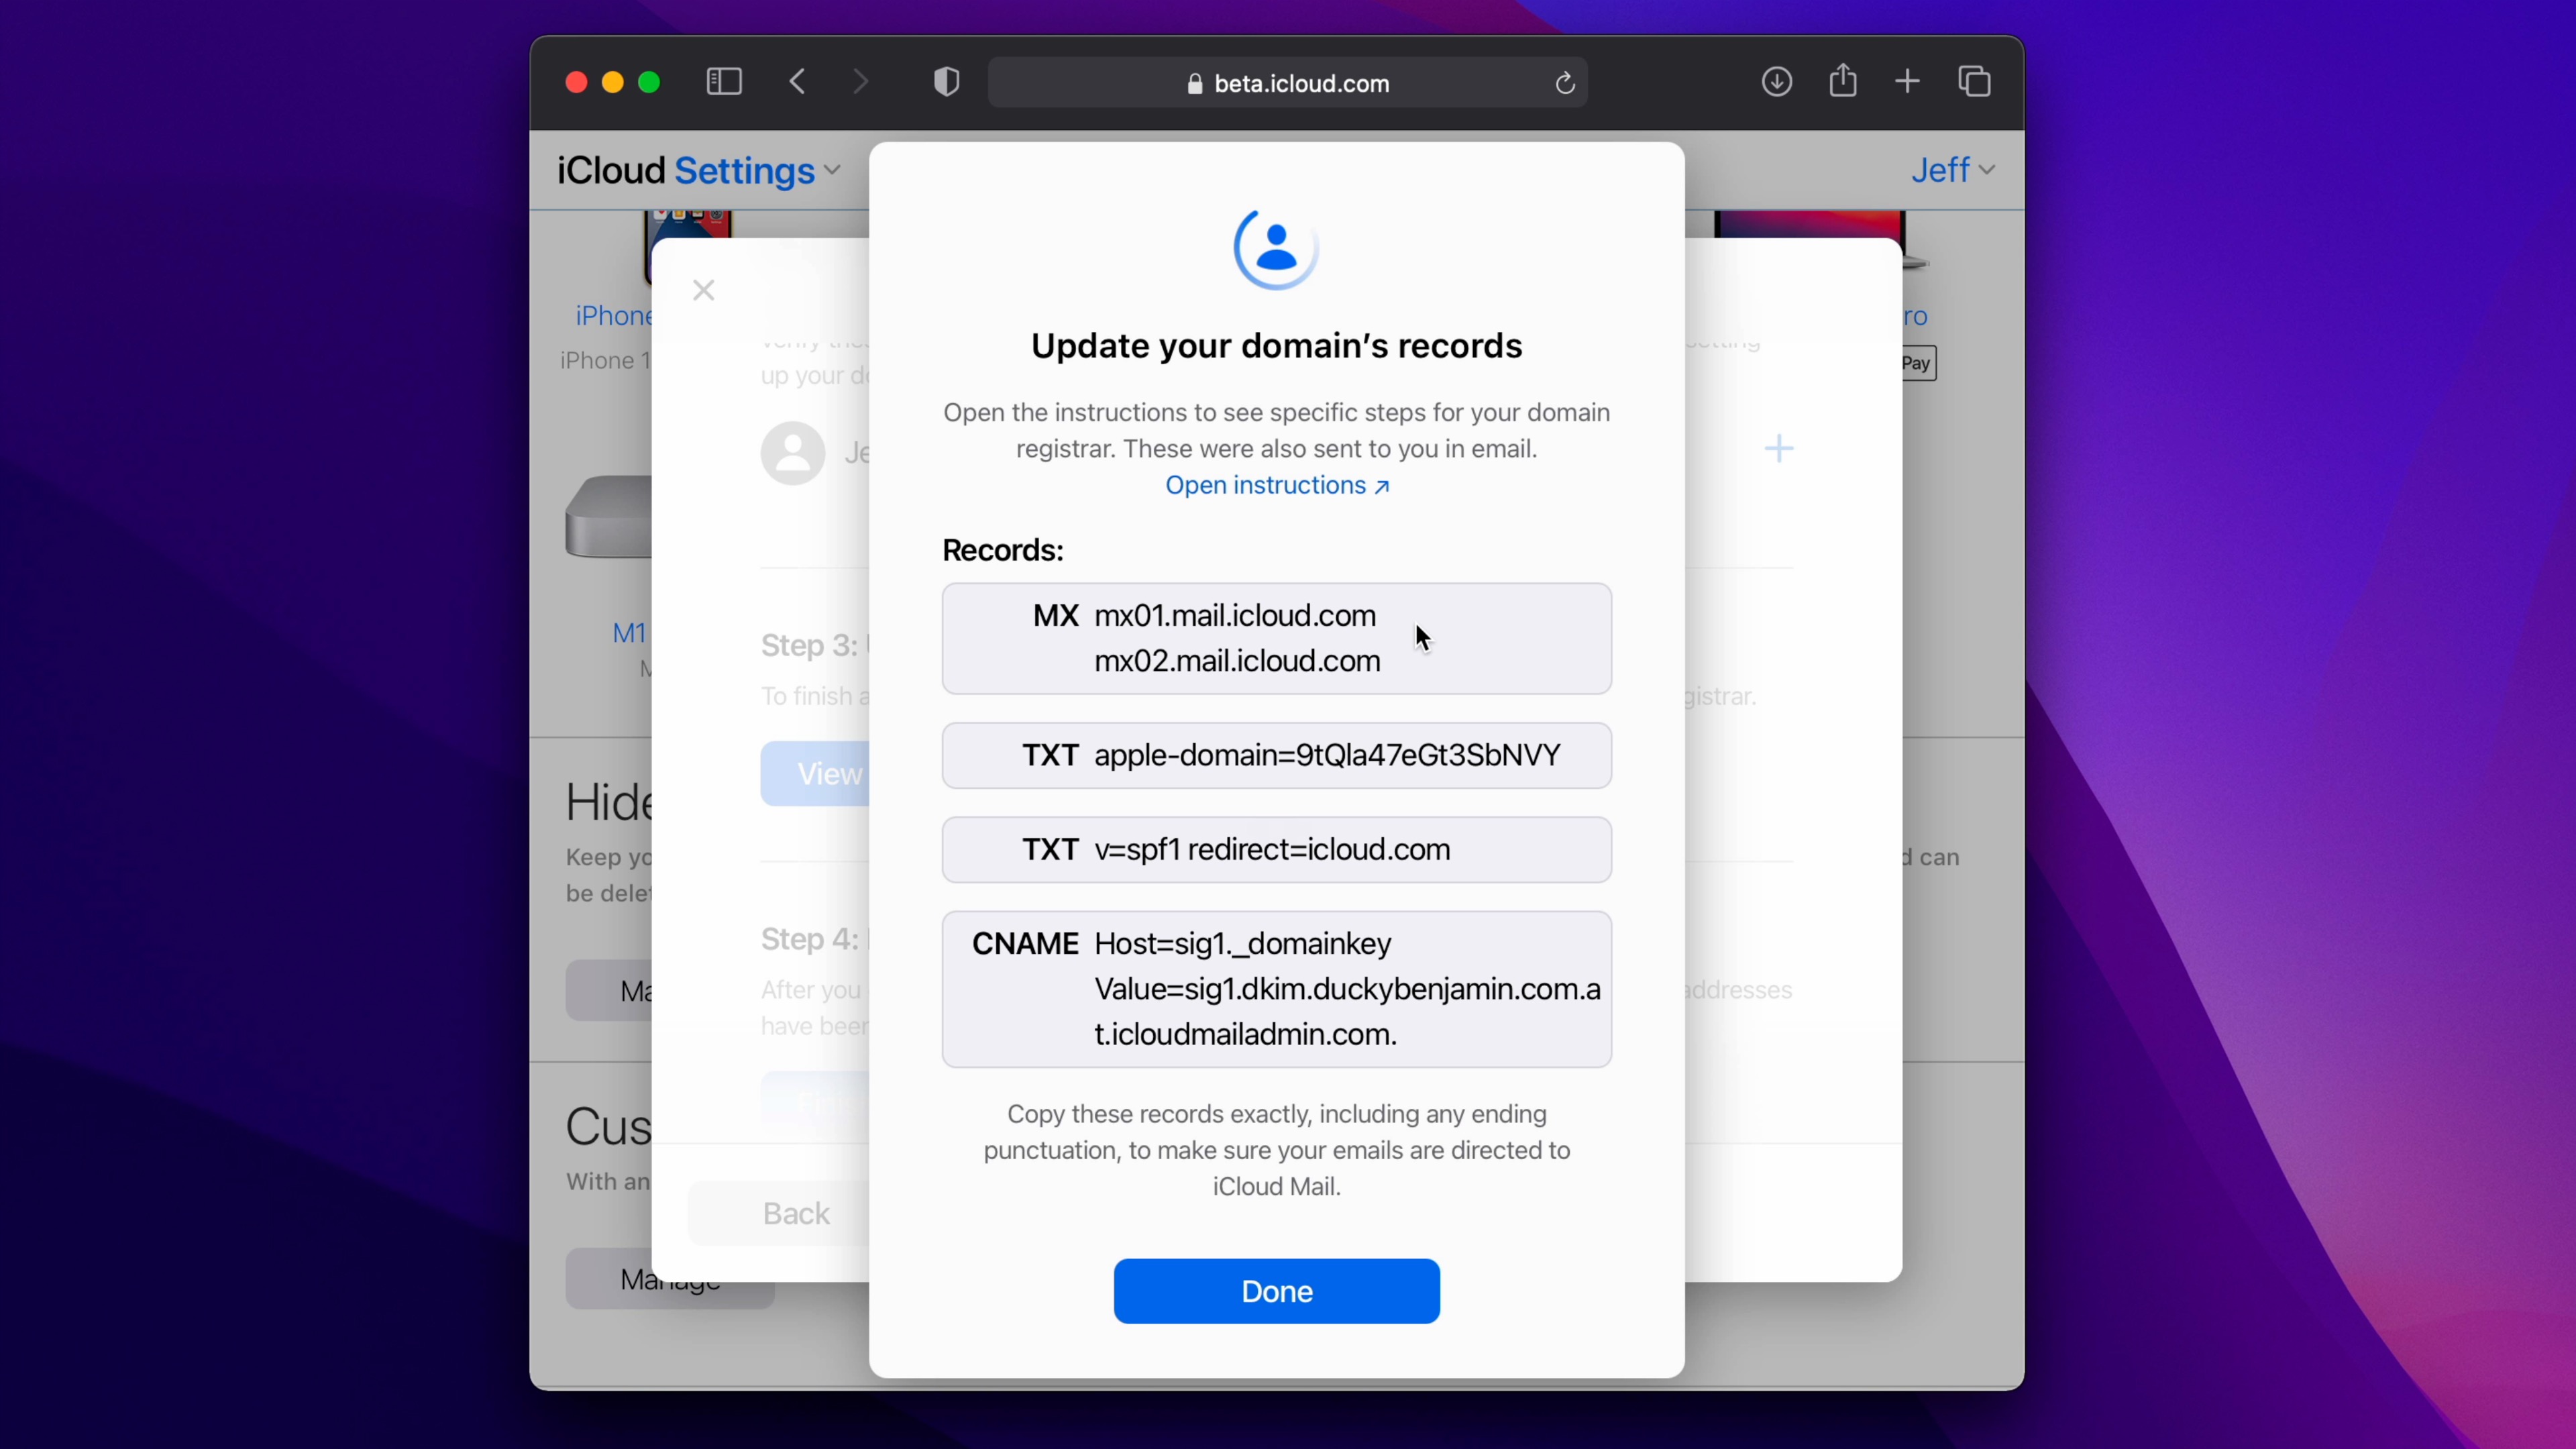
Step 6: Click the View button under Update your domain registrar’s settings. This will open a window outlining all of the DNS records that you’ll need to add to your domain registrar.
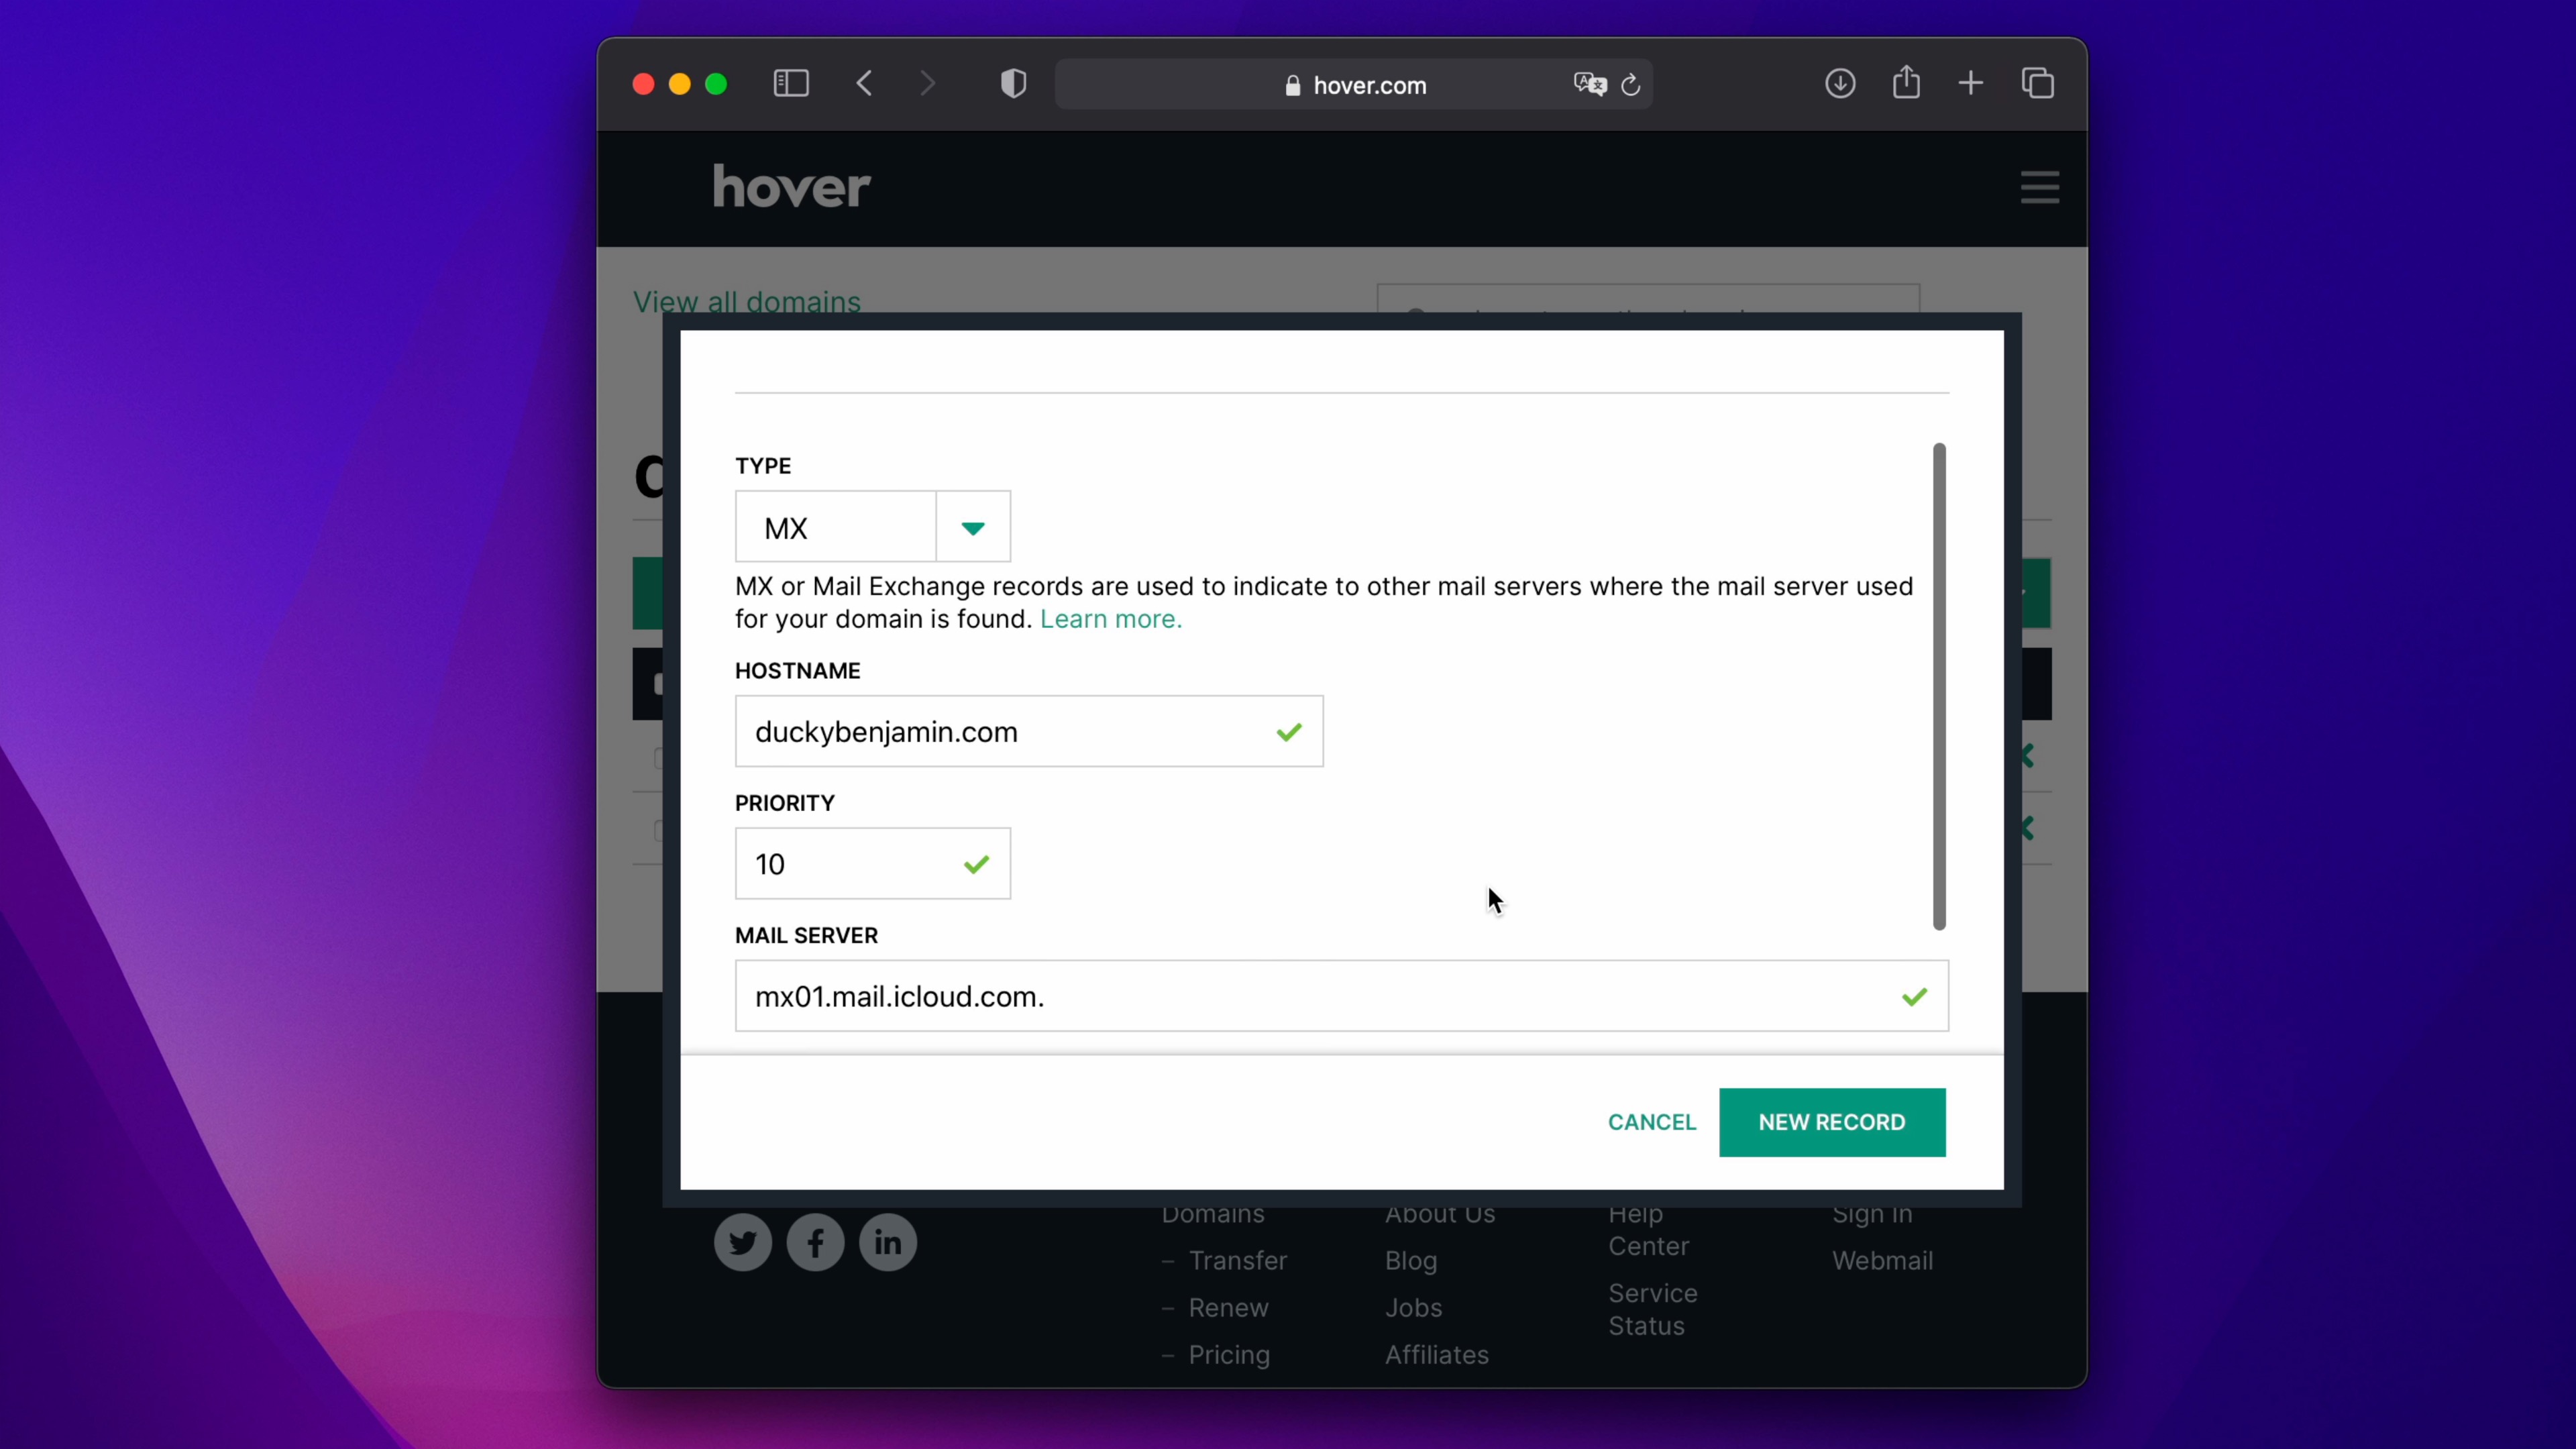
Step 7: Login to your domain registrar and select your custom domain. If you have existing DNS records associated with mail, you may decide to remove those at this time.
Step 8: Add the listed DNS records to your domain registrar. You should add a total of five records. The records that you need to add are as follows:
MX records
| Type | Hostname | Mail Server | Priority | TTL |
| MX | [your_domain.com] | mx01.mail.icloud.com. | 10 | 3600 |
| MX | [your_domain.com] | mx01.mail.icloud.com. | 10 | 3600 |
TXT records
| Type | Hostname | Content | Priority | TTL |
| TXT | [your_domain.com] | see personal TXT record provide by Apple | 10 | 3600 |
| TXT | [your_domain.com] | v=spf1 redirect=icloud.com | 10 | 3600 |
CNAME record
| Type | Hostname | Target Name | TTL |
| CNAME | sig1._domainkey | sig1.dkim.[your_domain.com].at.icloudmailadmin.com. | 3600 |
A few points of note:
- Please observe the period at the end of the mail server for MX records.
- Apple provides custom content values for one of the TXT records.
- The CNAME record is the only record that doesn’t feature your domain as the hostname.
- The CNAME record’s target name includes your domain as a part of the full address.
- TTL values of 3600 = 1 hour
Step 9: Once all of the required records are added to your domain registrar, click the Finish set up button to confirm that your settings are correct. It may take several minutes for the changes to propagate, so if you get an error message asking you to check your MX or SPF record, try again in a few minutes. If you continue to get the error after an extended time, verify that you’ve entered the records correctly.

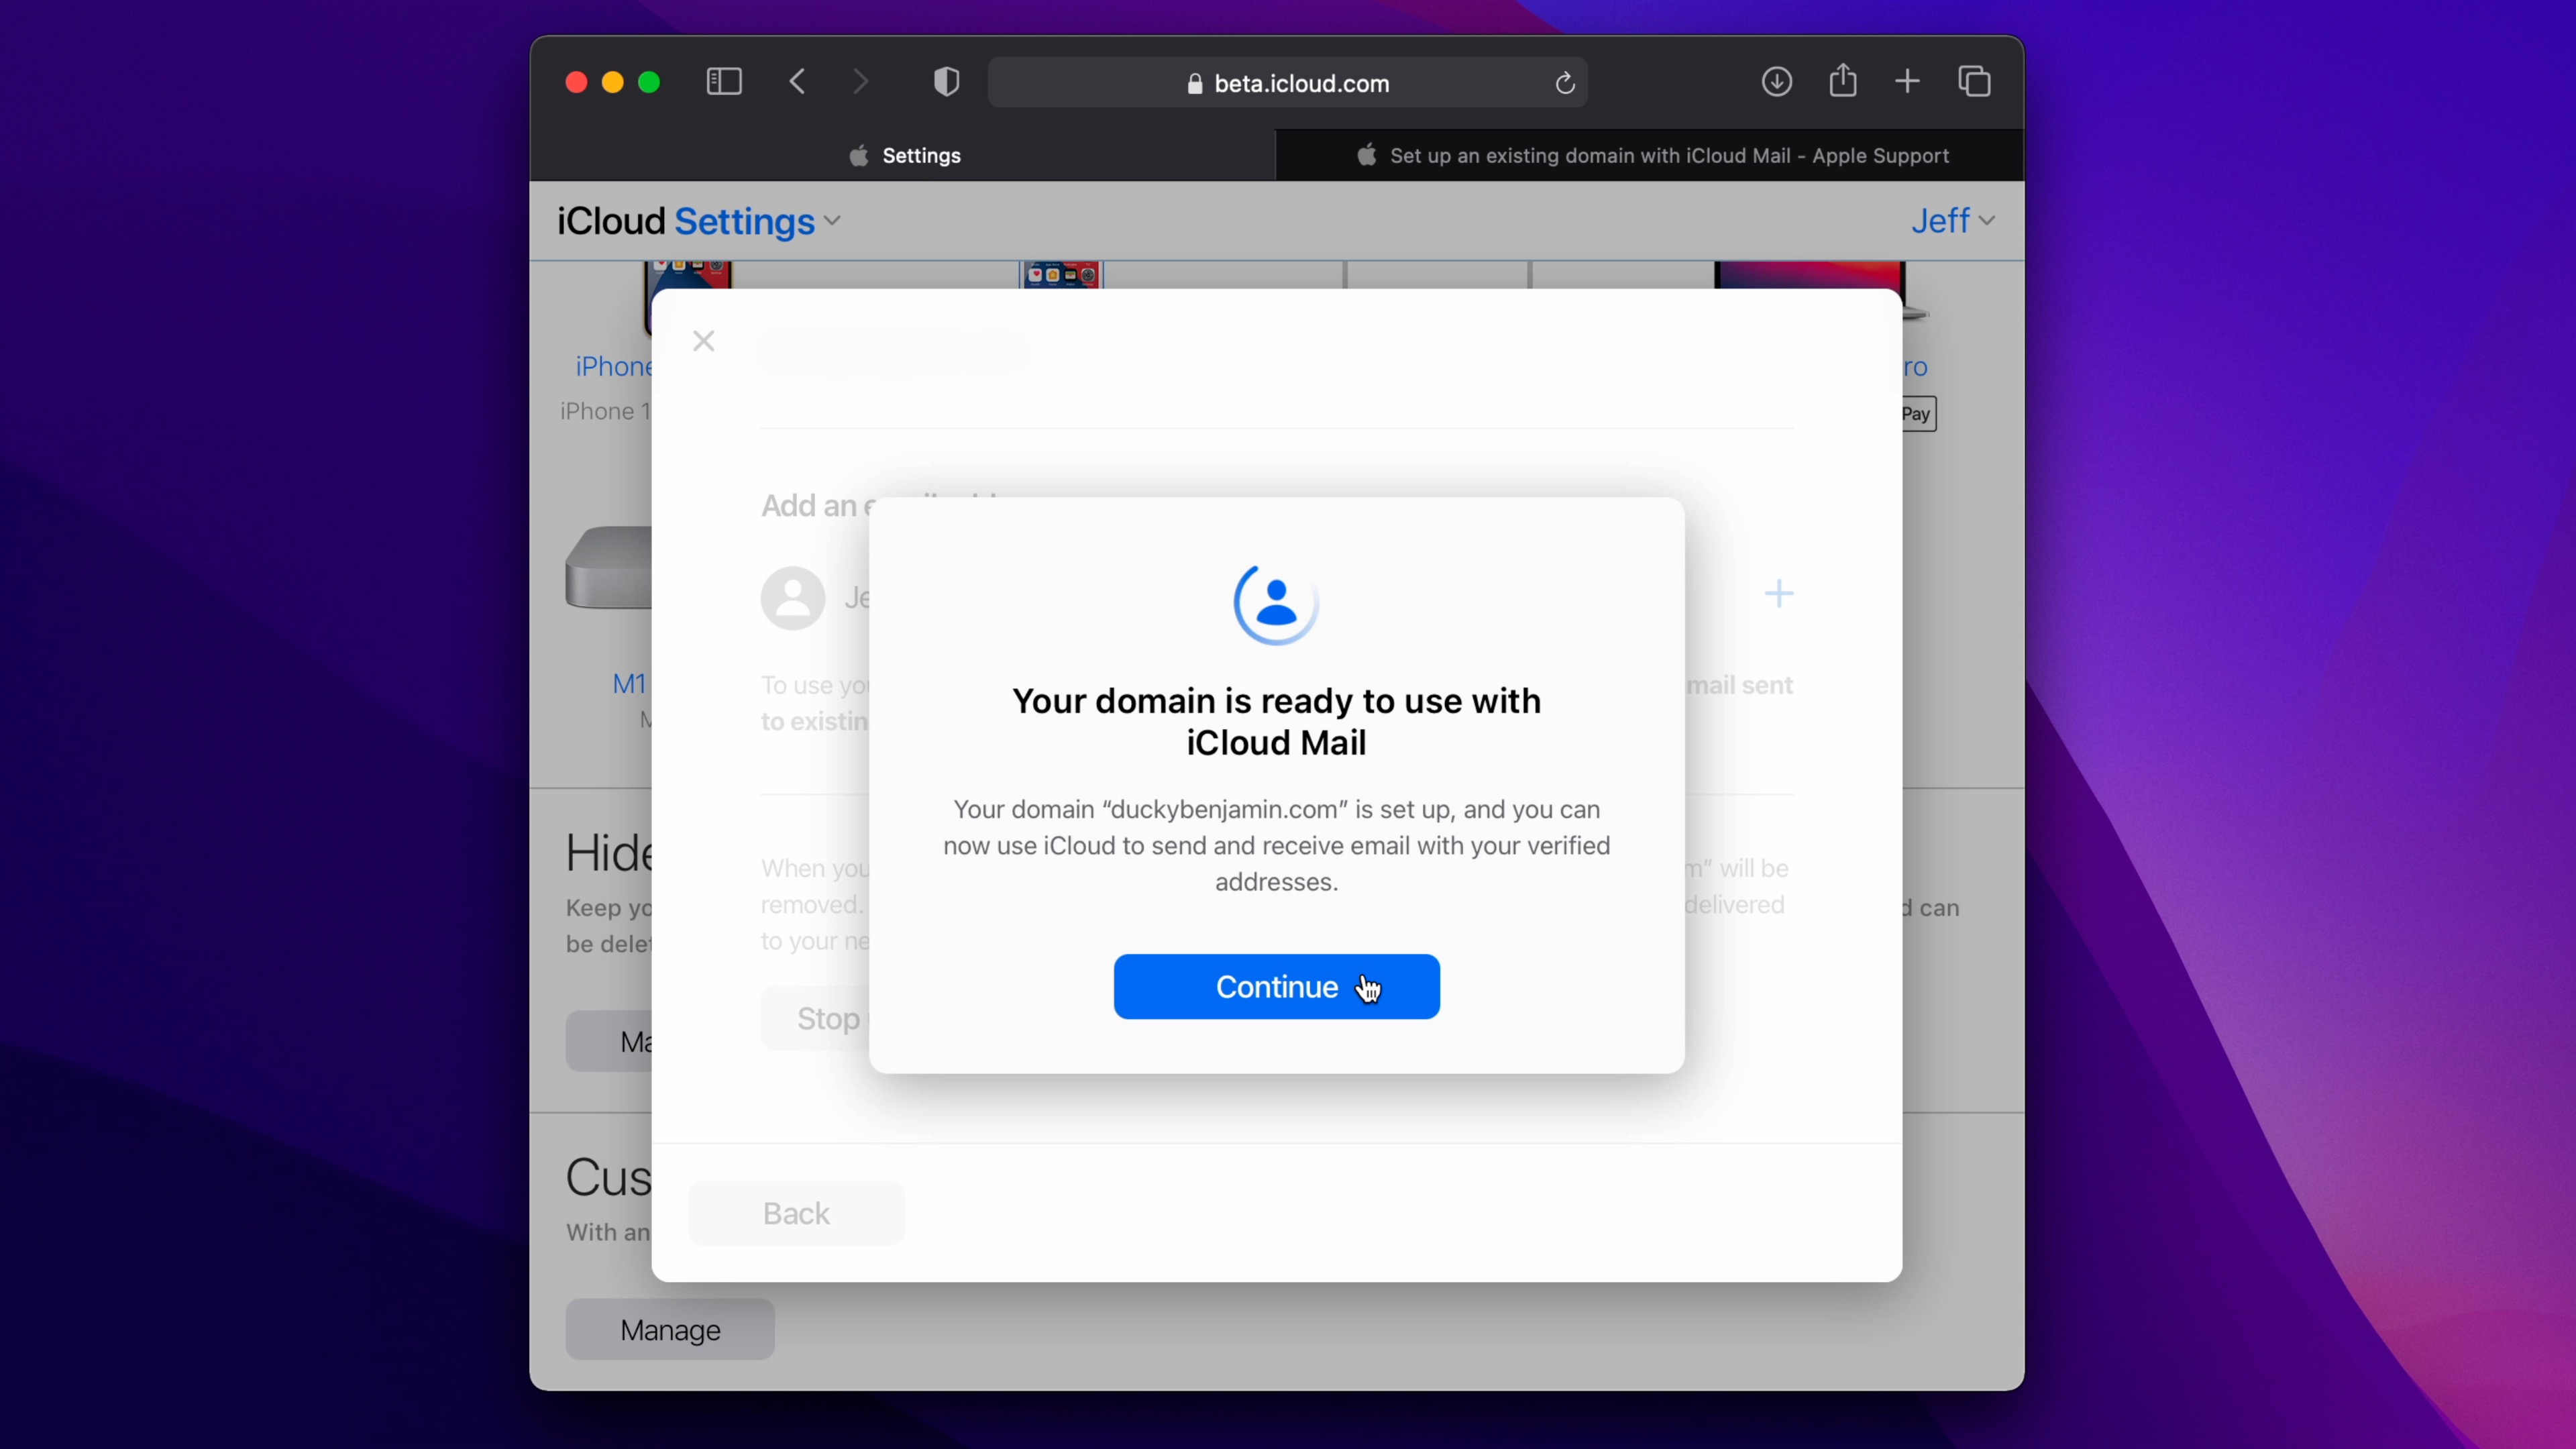
Step 10: Once the DNS records have been verified, you’ll receive a message that says your domain is ready to use with iCloud Mail. Click the Continue button to proceed.
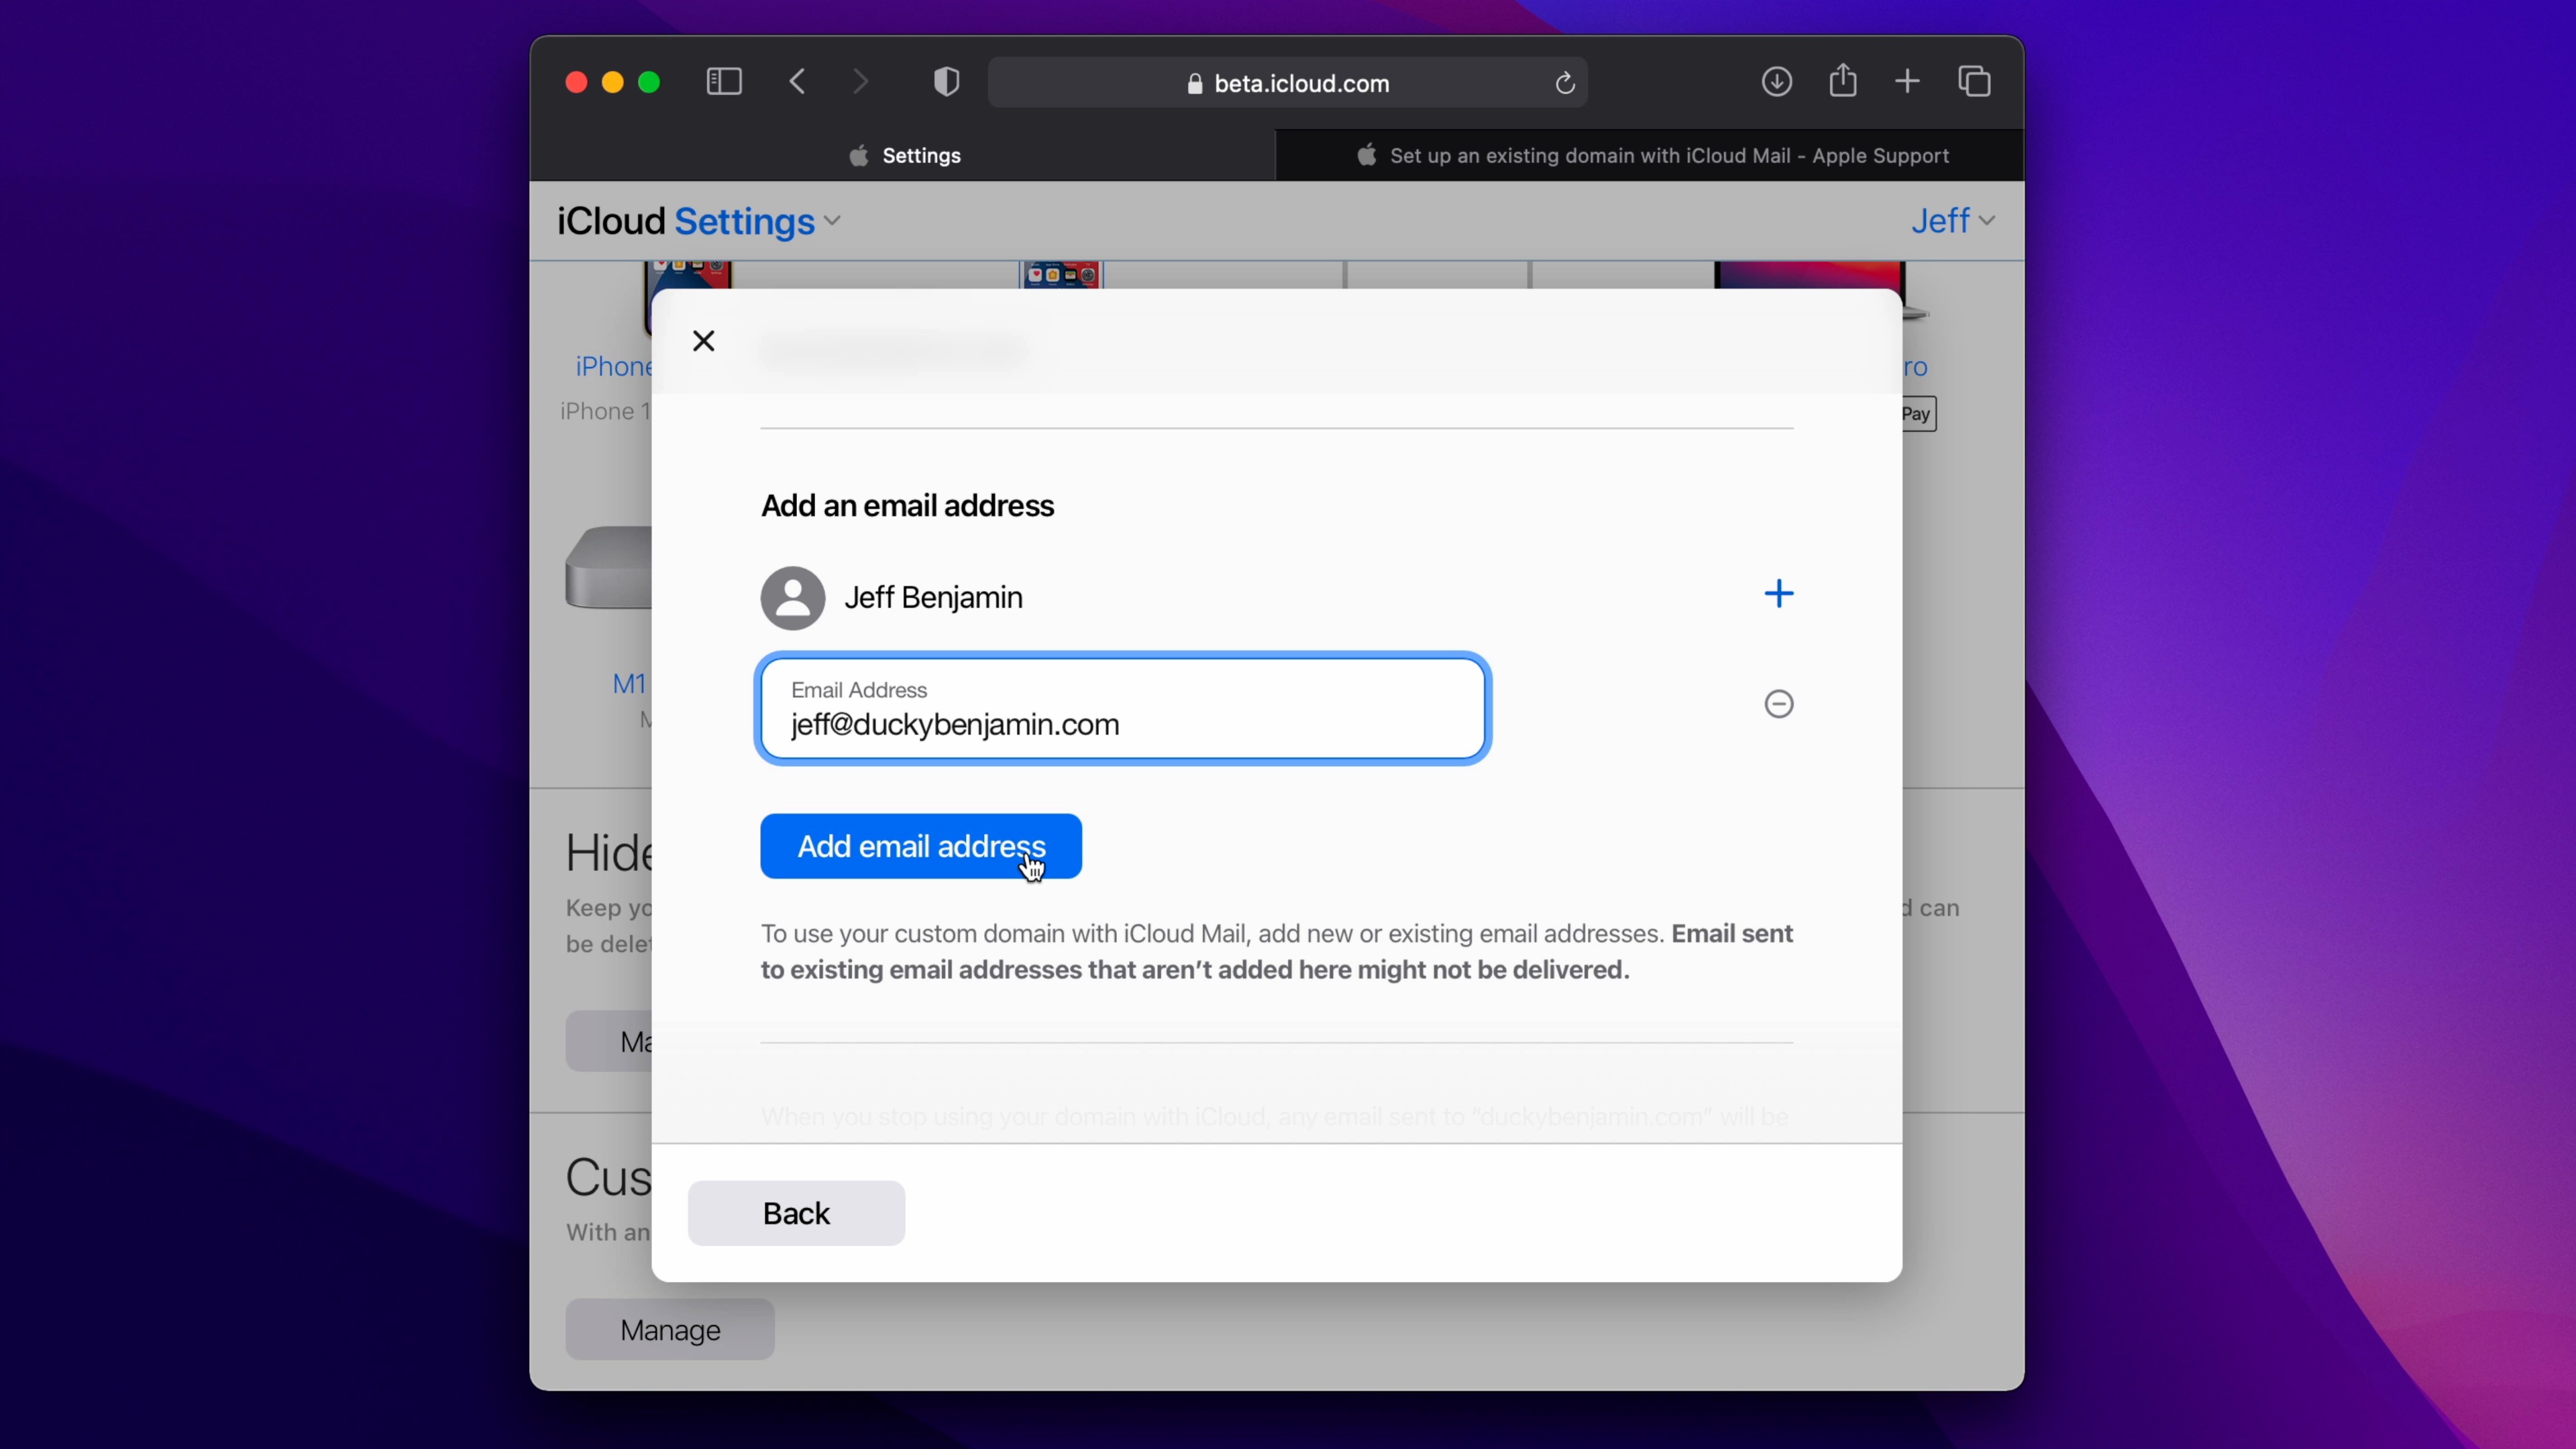
Step 11: Add an email address using the section that we skipped in step 5. You’ll want to make sure that your email address includes your newly set up custom domain. In my case, I’ve added jeff@duckybenjamin.com. Click Add email address to confirm.
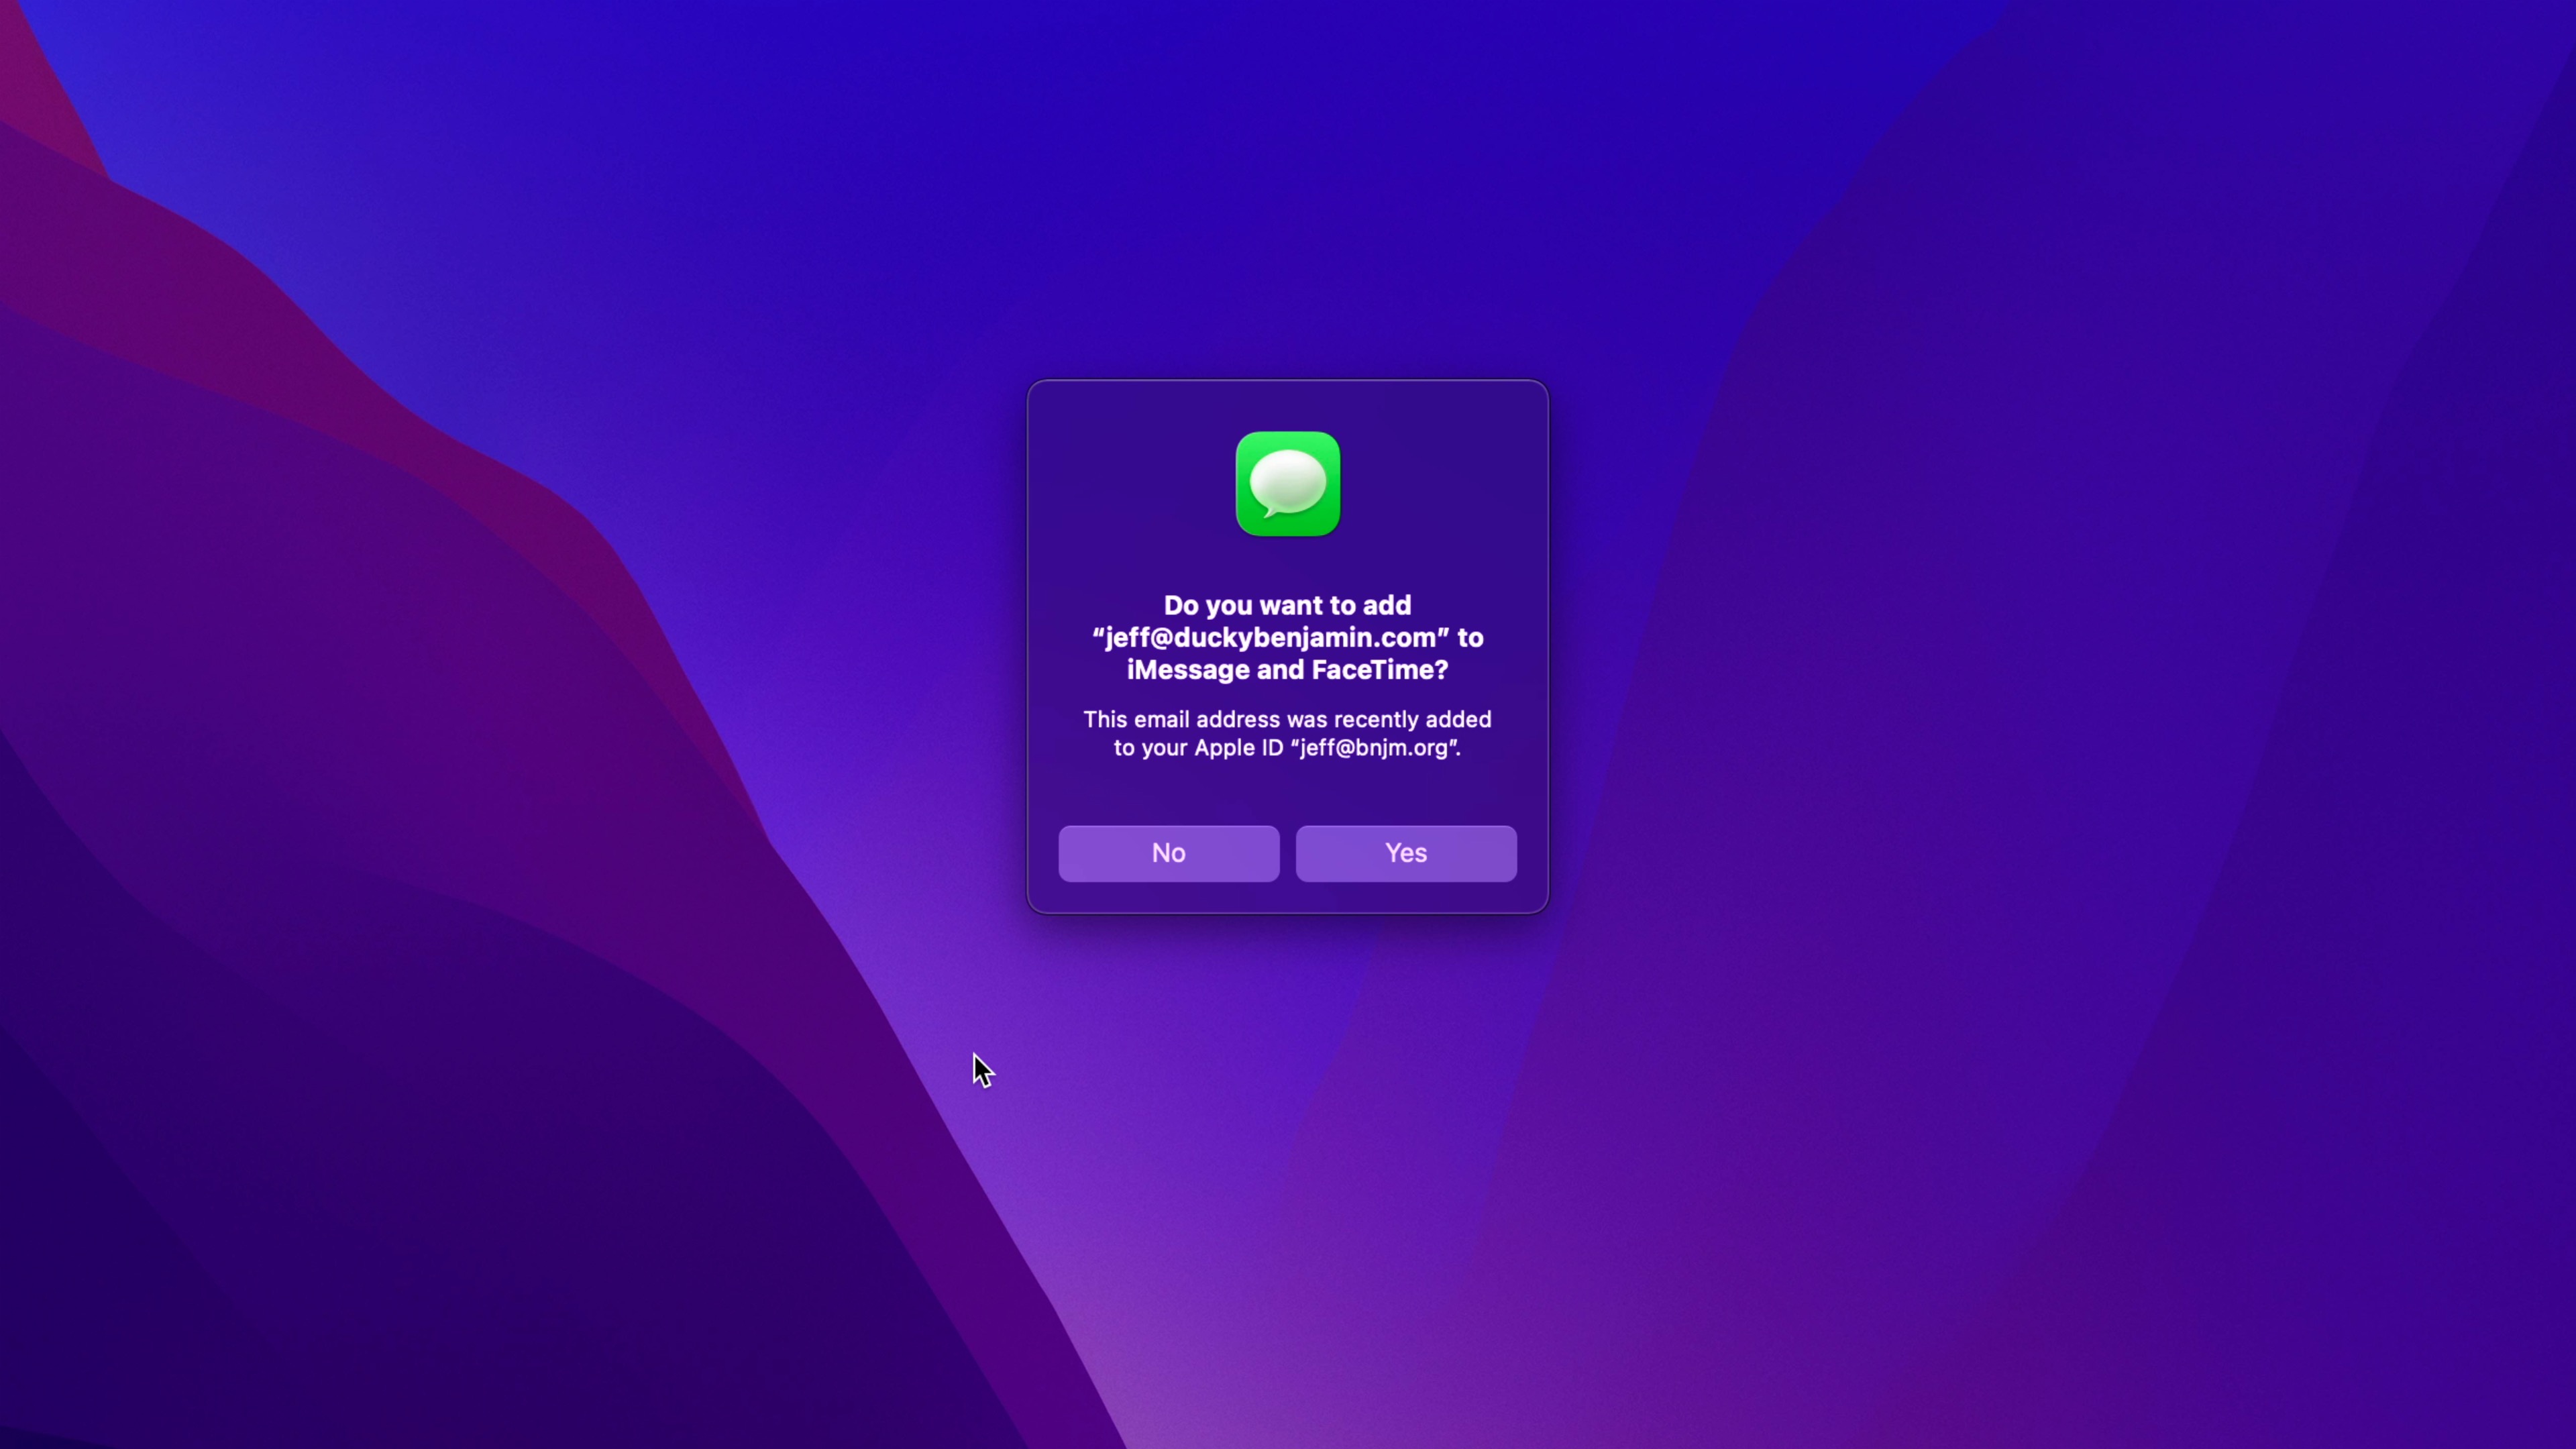
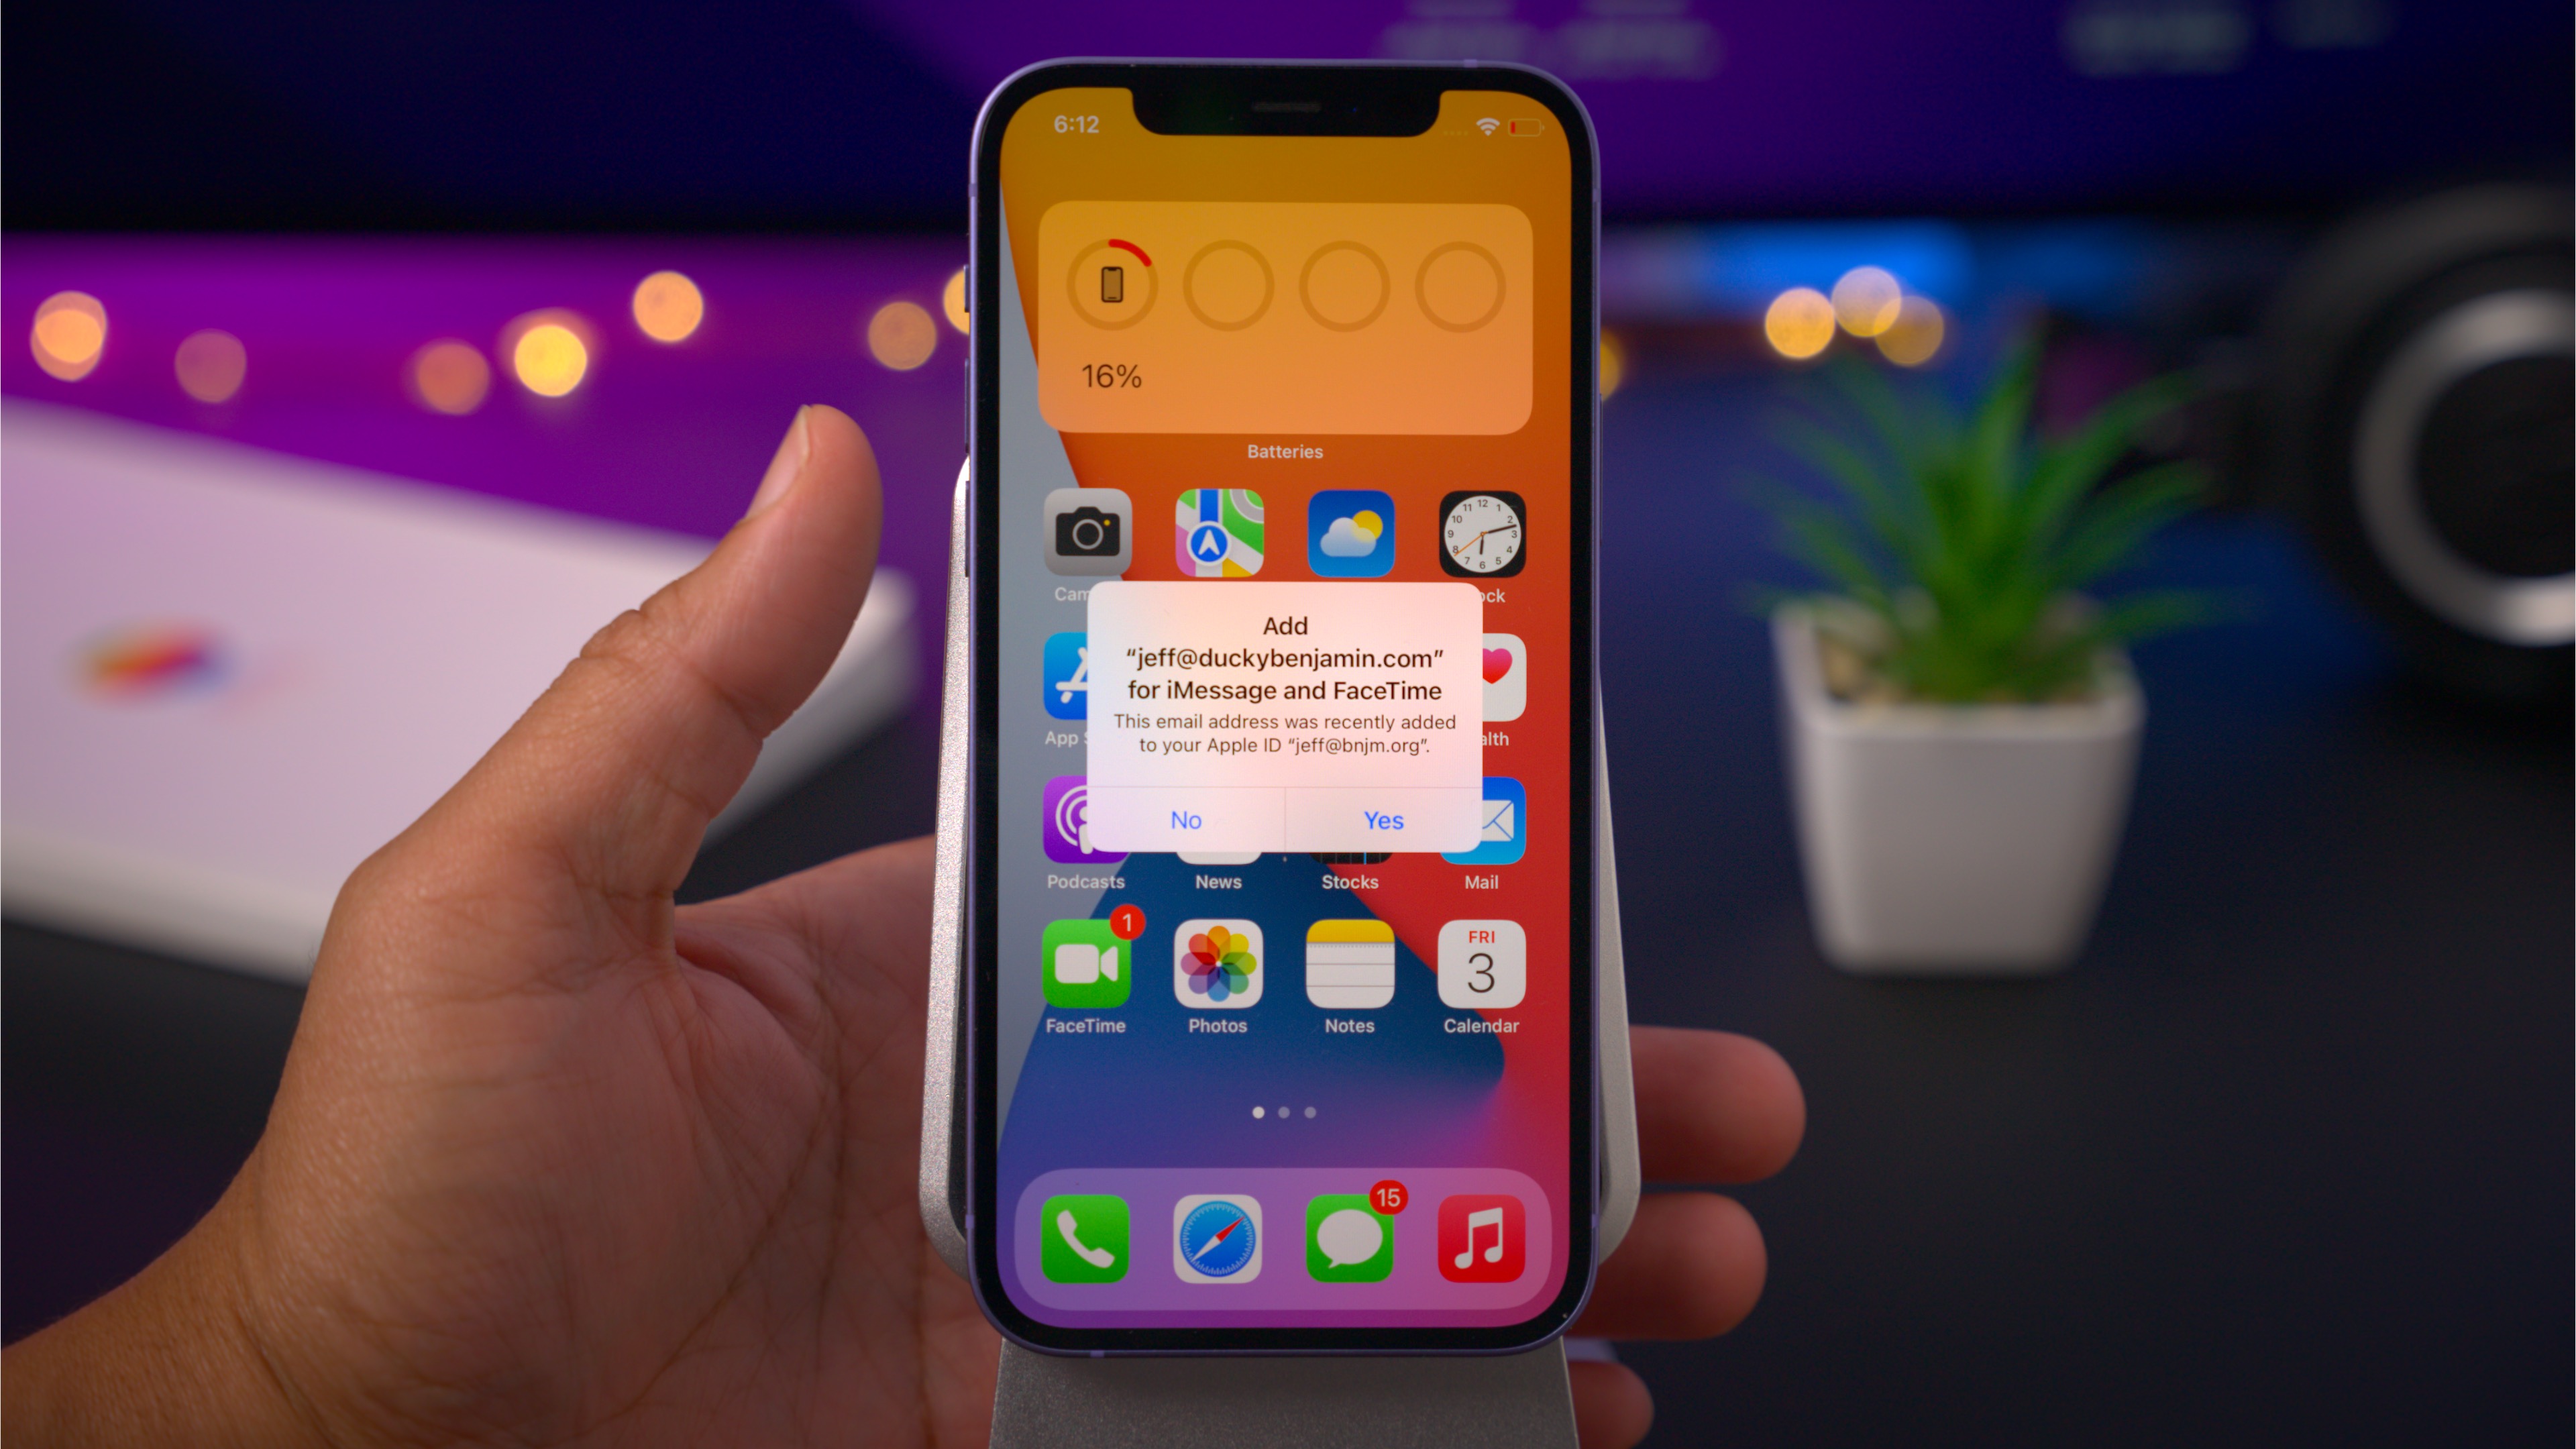
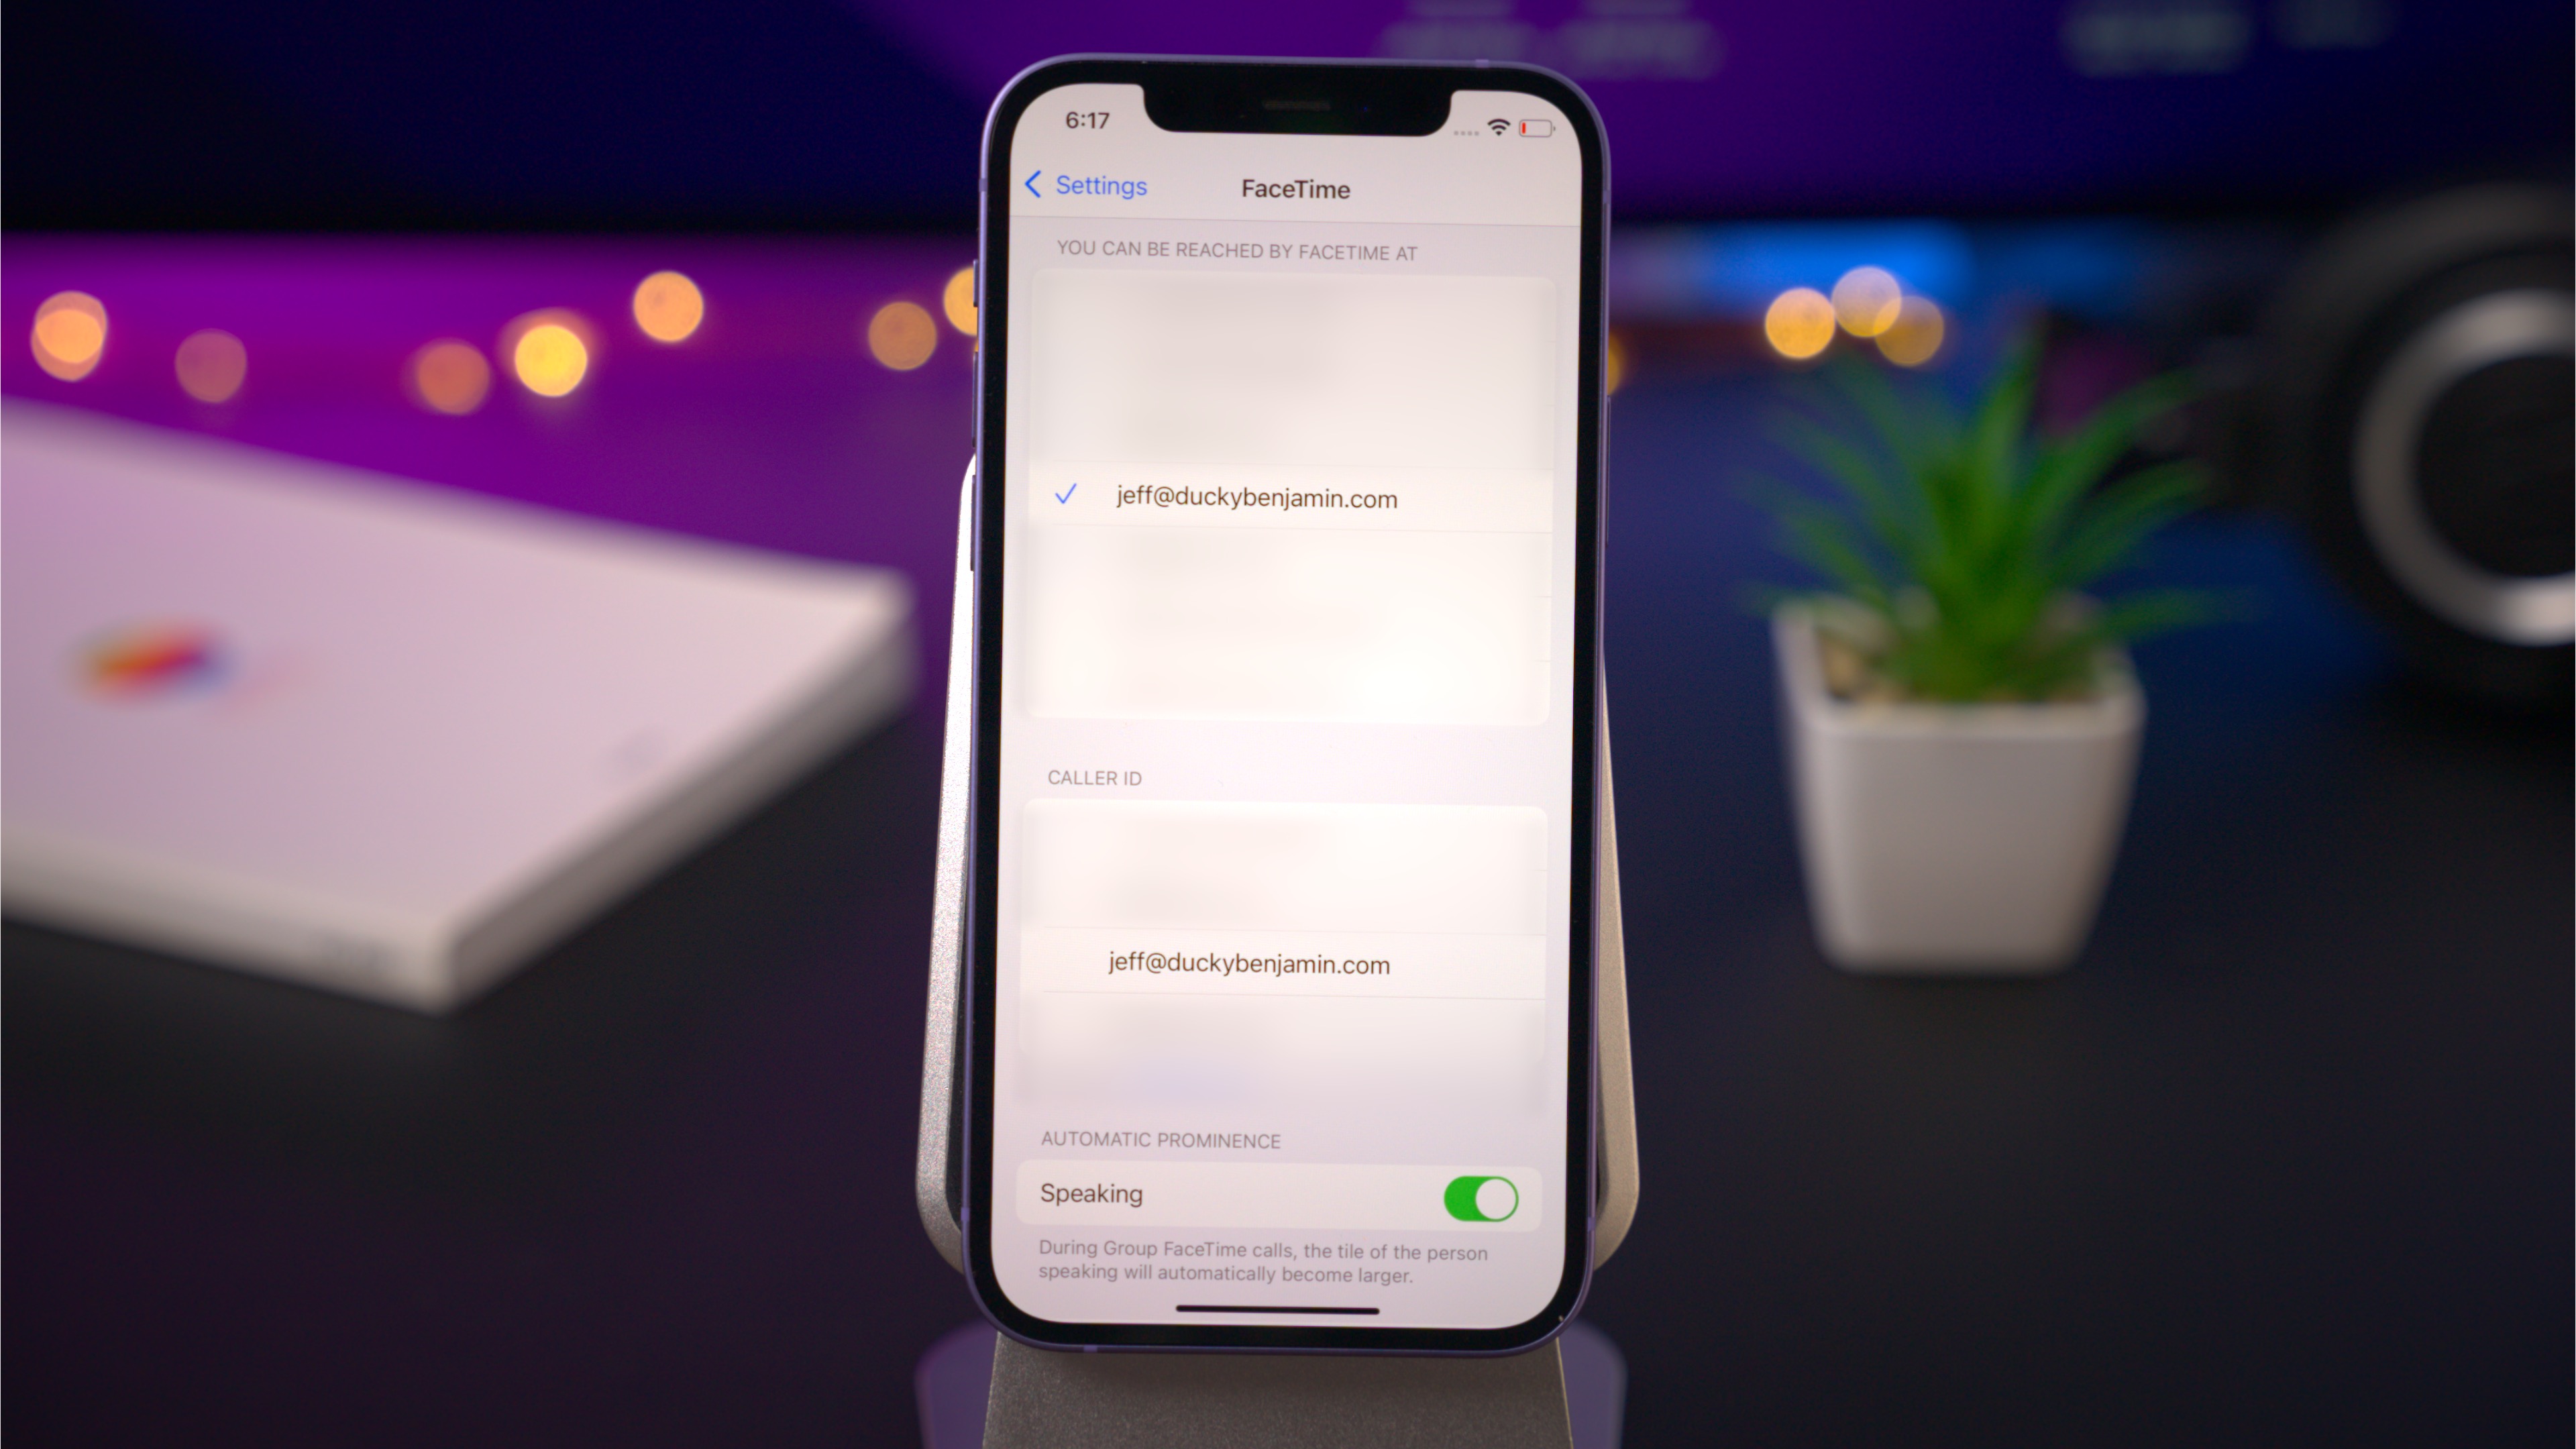
Assuming that you’re logged into iCloud on your iOS devices and Macs, you may start to receive notifications that your new email address is available to be used with iMessages and FaceTime. If you aren’t logged in to iCloud on your devices, do so now, and ensure that you have Mail enabled for iCloud.
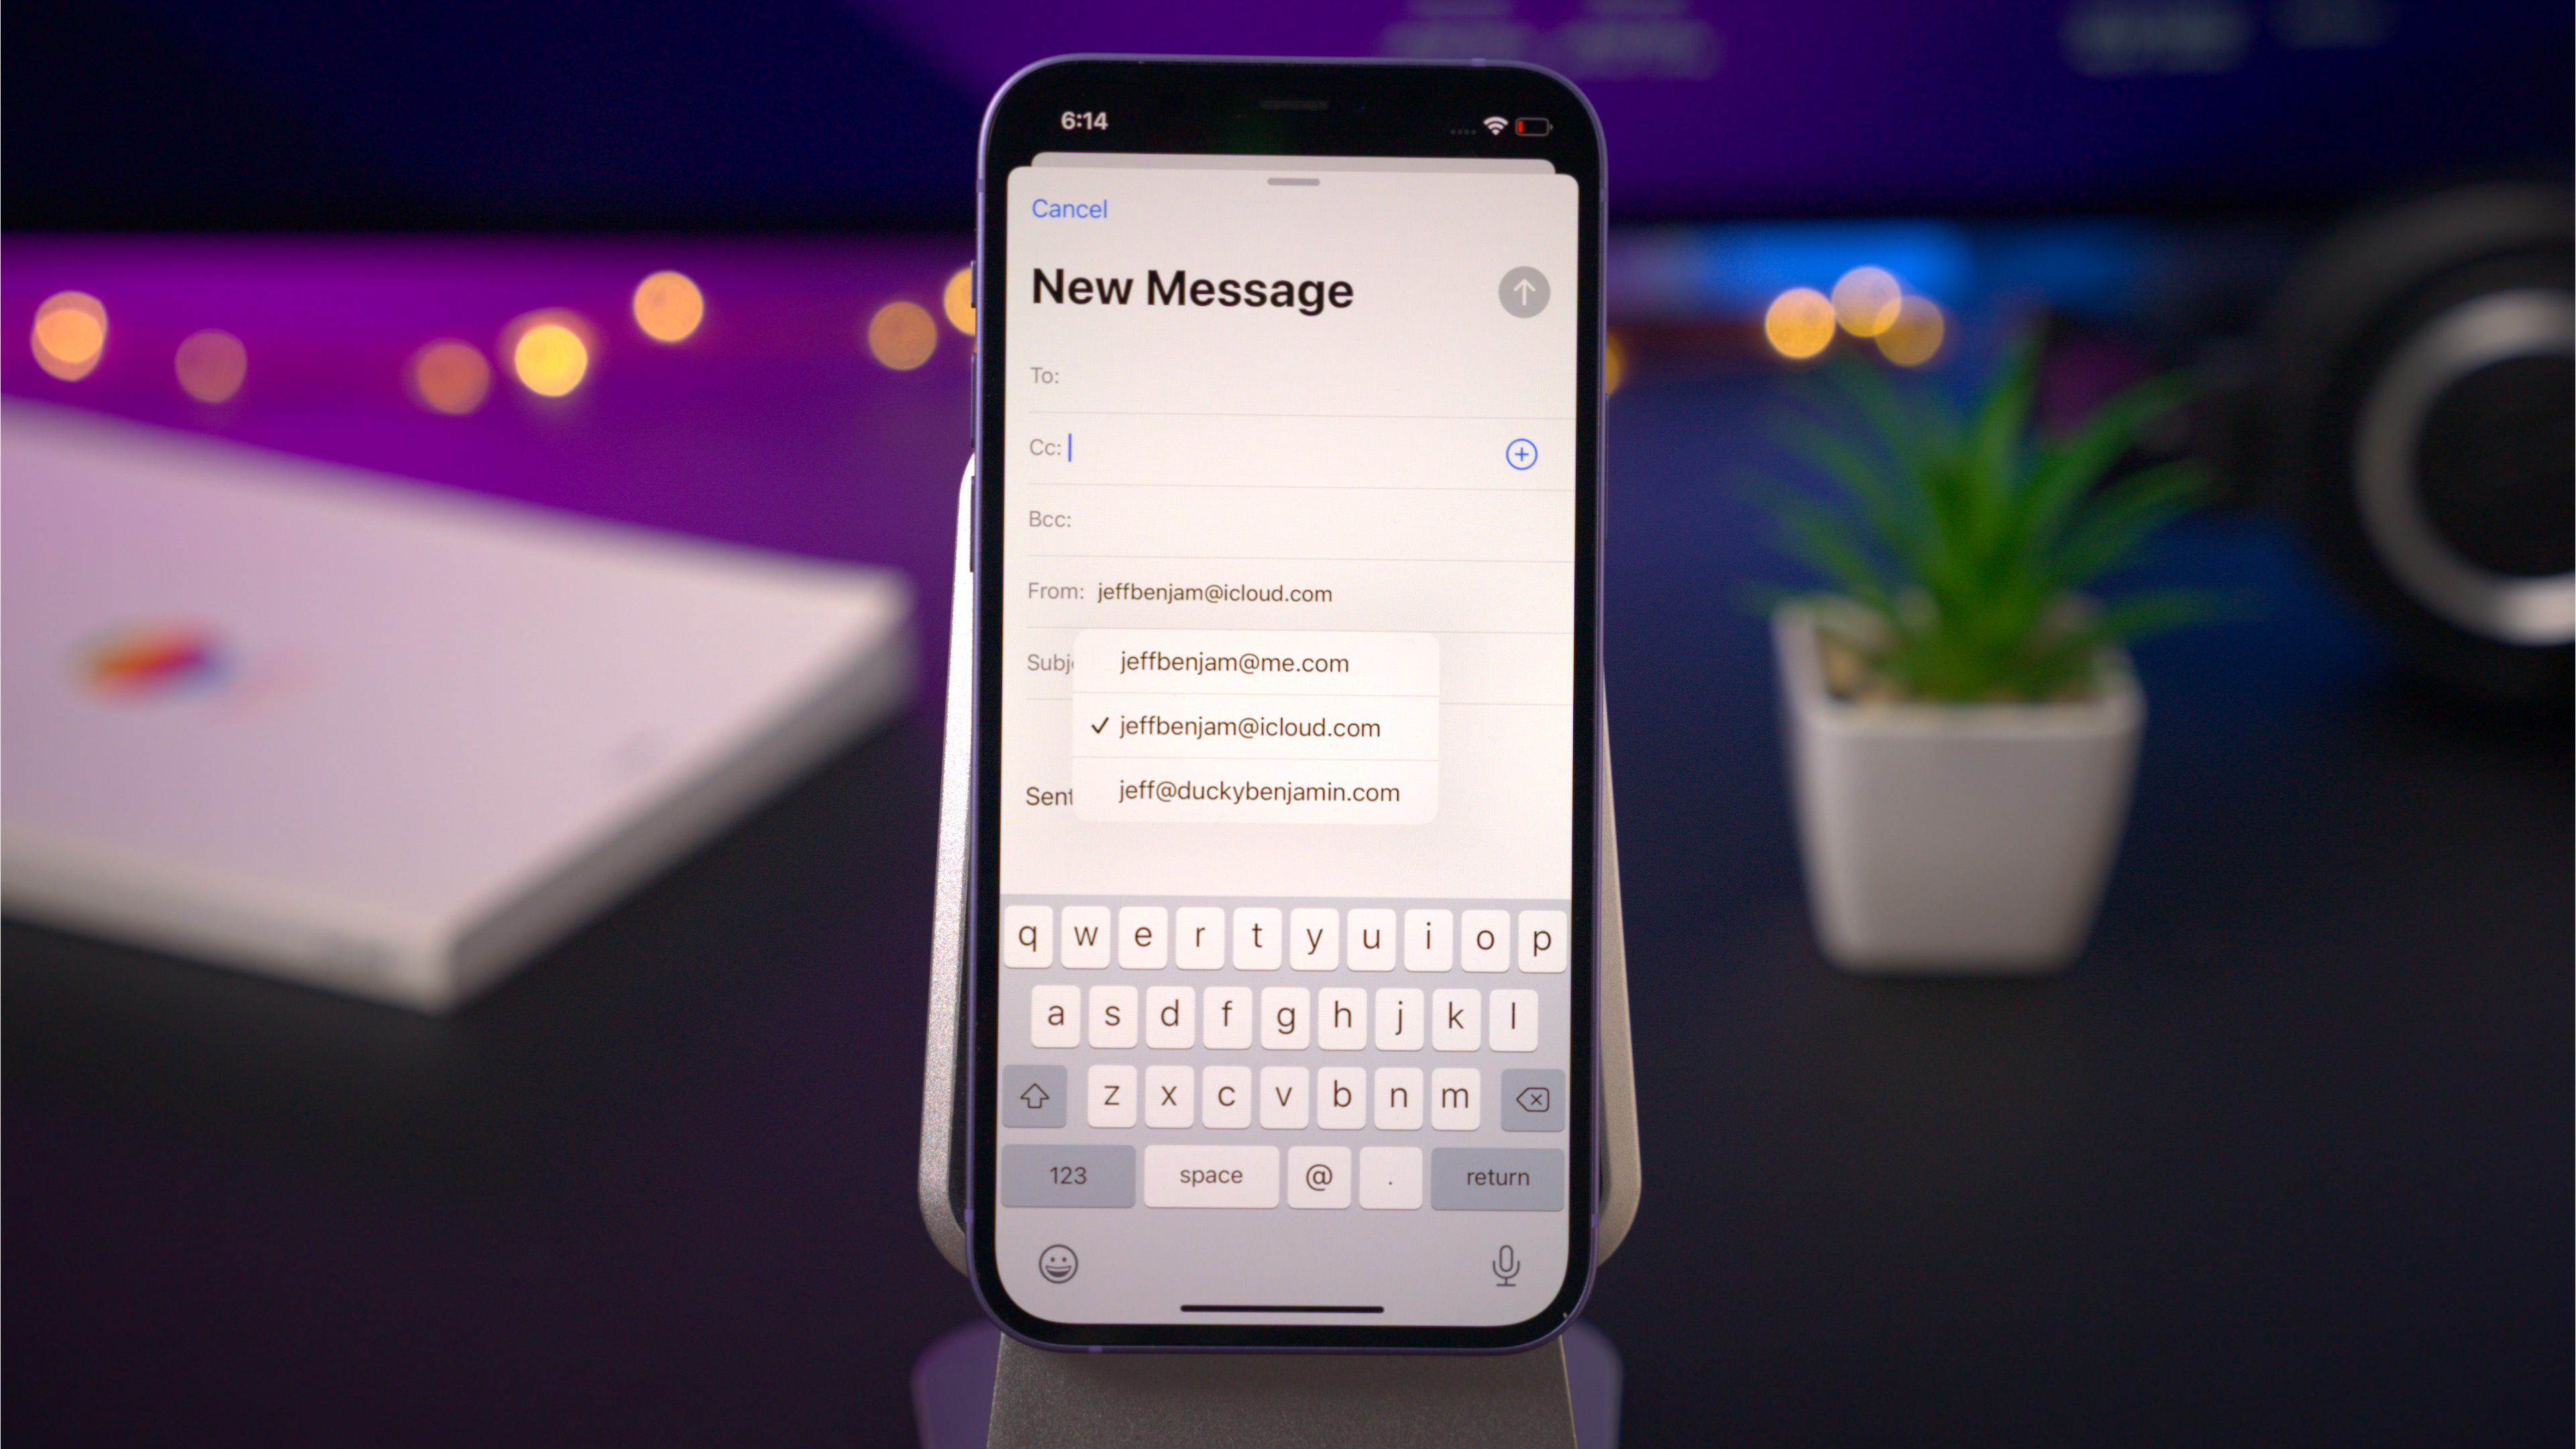
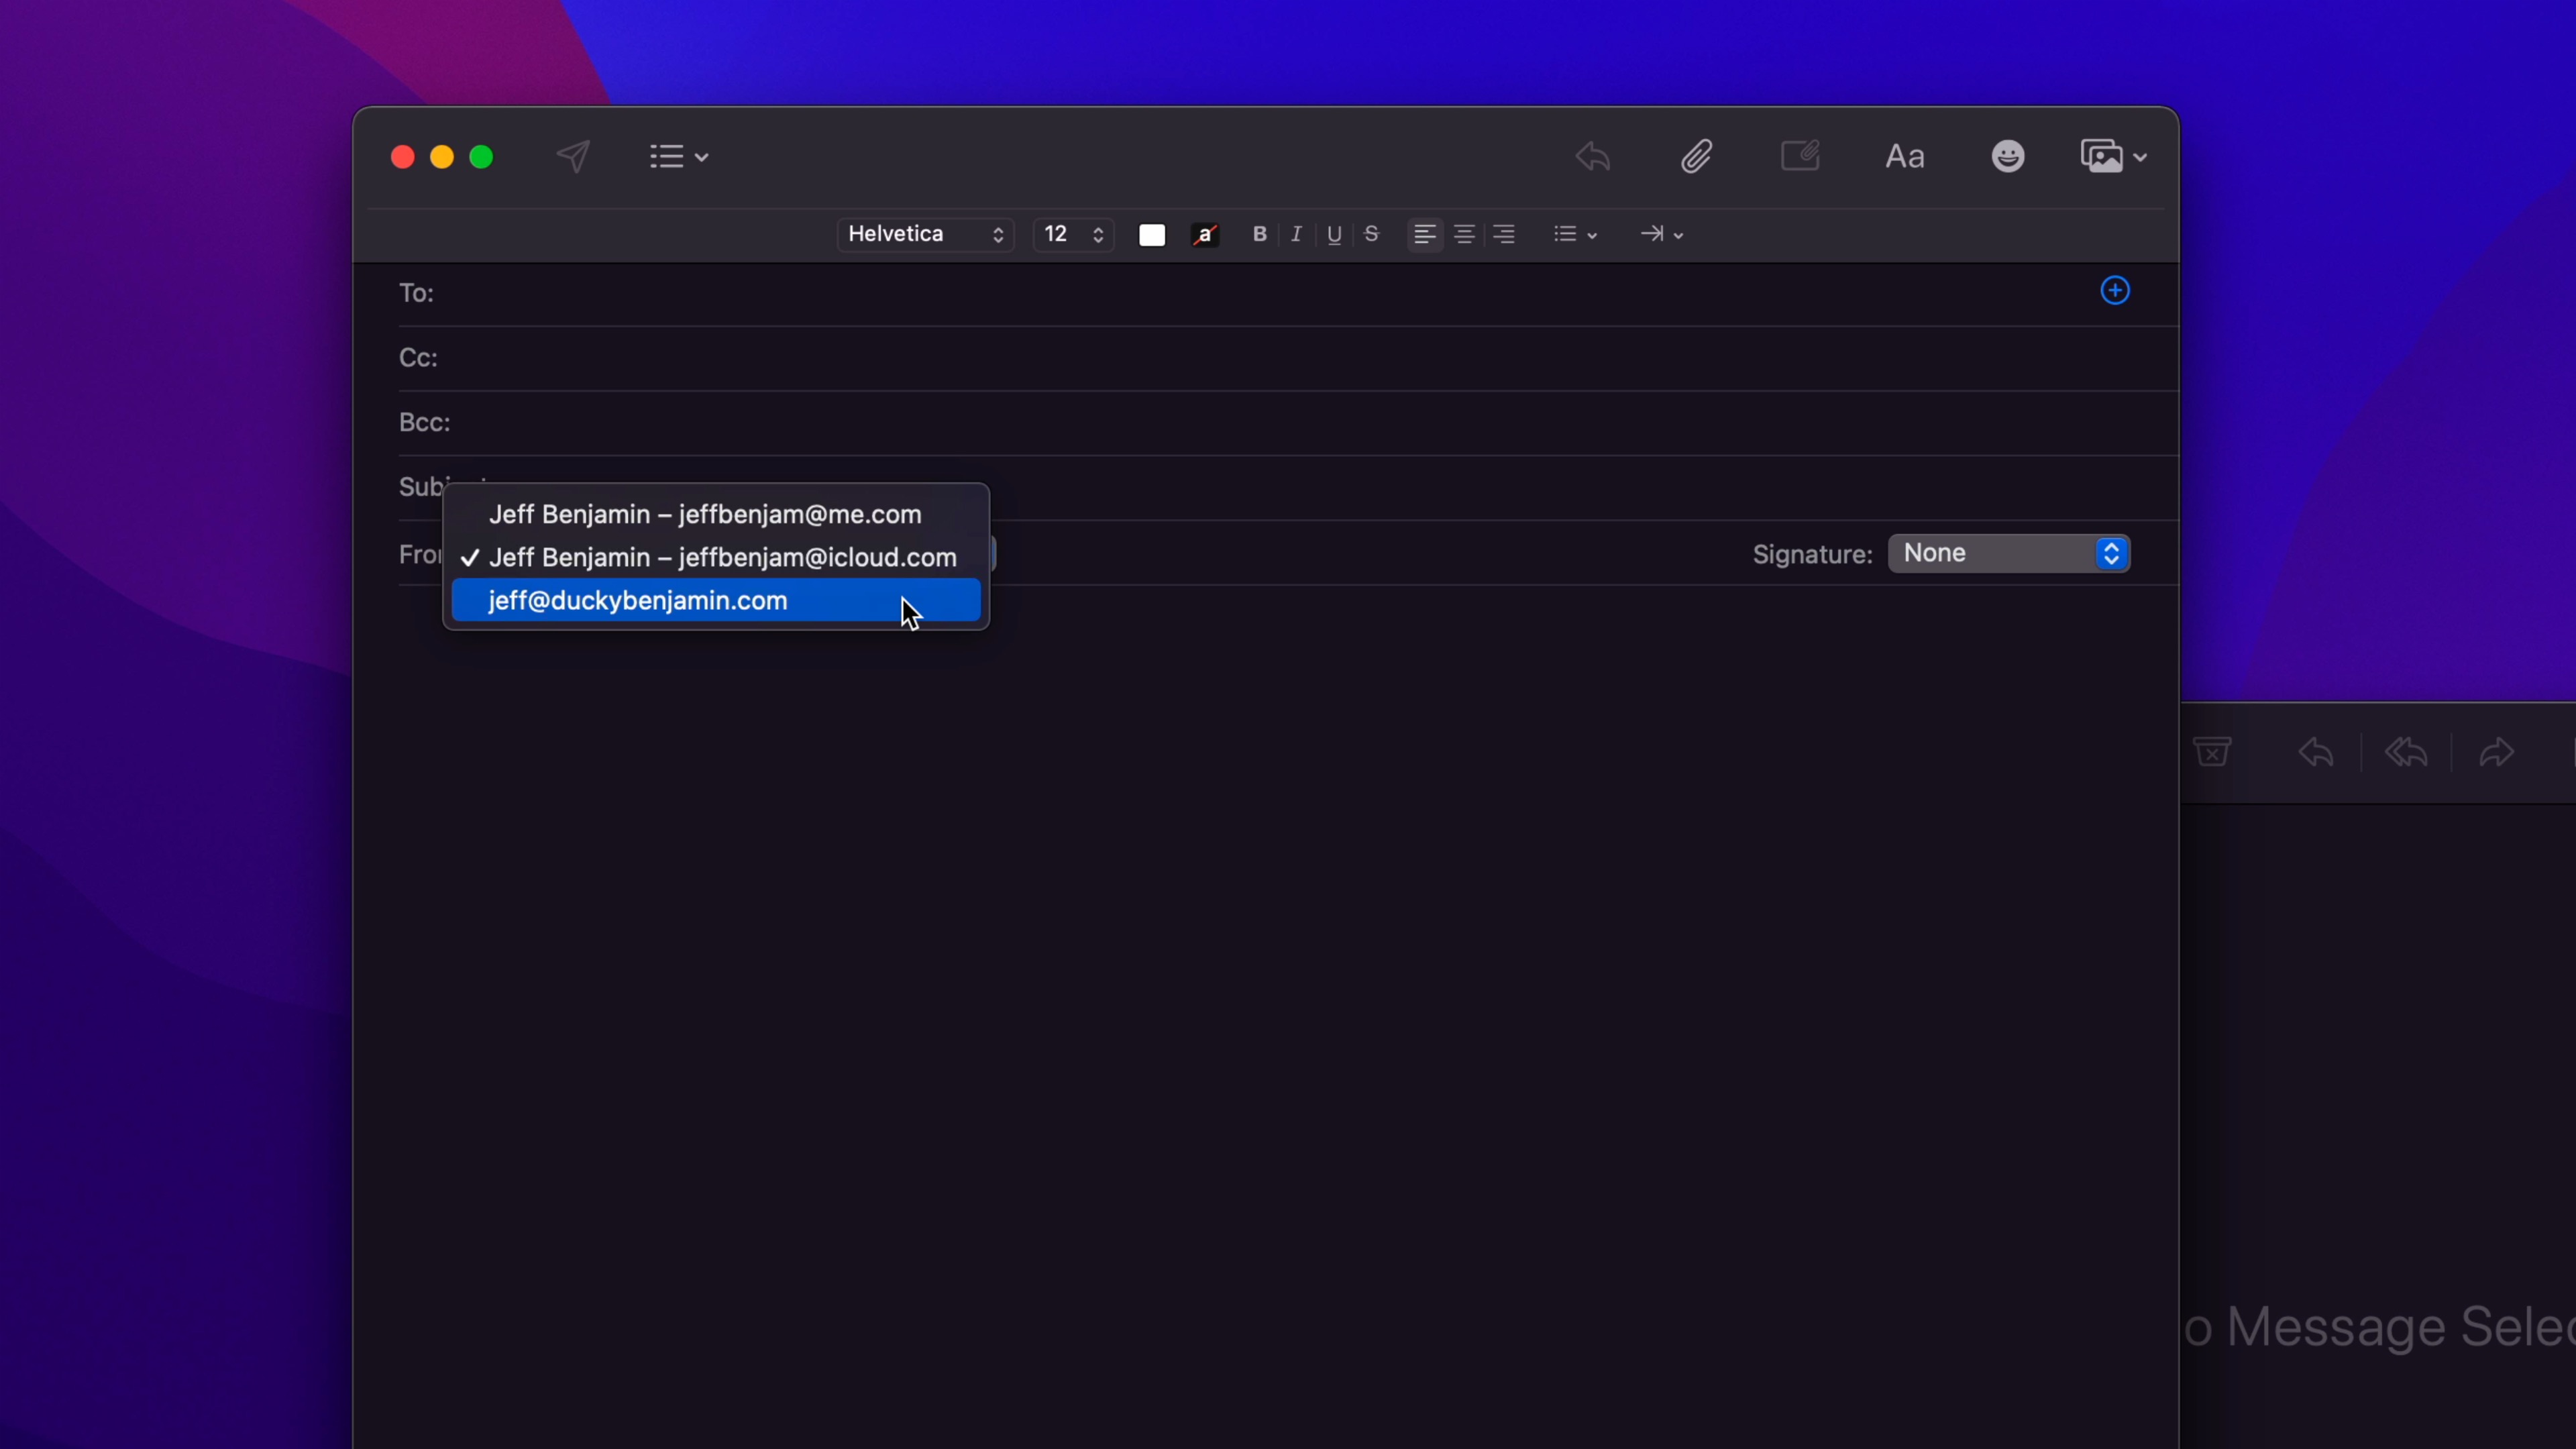
Step 12: Open the Mail app, and you should see your custom domain available in the From drop down box. You can now send and receive email via iCloud Mail with your custom domain.
Conclusion
In just a few minutes you can purchase a new domain, and have it running on iCloud Mail. Of course, you don’t have to use iCloud Mail with your custom domain, you can use hosting from Google, FastMail, or others. Whatever you decide to choose, I’m a big advocate of setting up your own custom email domain.
Do you use a custom email domain? Why or why not? Sound off in the comments with your thoughts.
FTC: We use income earning auto affiliate links. More.


Comments