How to use your iPhone as a wireless trackpad in iOS 16
 Nathaniel Pangaro
The iPhone has deep functionality, and an app lets you use it as a wireless trackpad for your Mac. Here's how to do it.
With a free pair of apps called Remote Mouse, you can control many functions of your Mac straight from your phone in iOS 16. Here are how you can set it up and the features you can control from your iPhone.
How to use an app to make your iPhone a wireless trackpad for your mouse
Setup on your iPhone and Mac is fairly easy and takes only a few steps. Here is how you can set up the wireless mouse functions on both of your devices.
On your iPhone
- Download the "Remote Mouse" app from the iOS App Store
- Launch the app once it has finished downloading
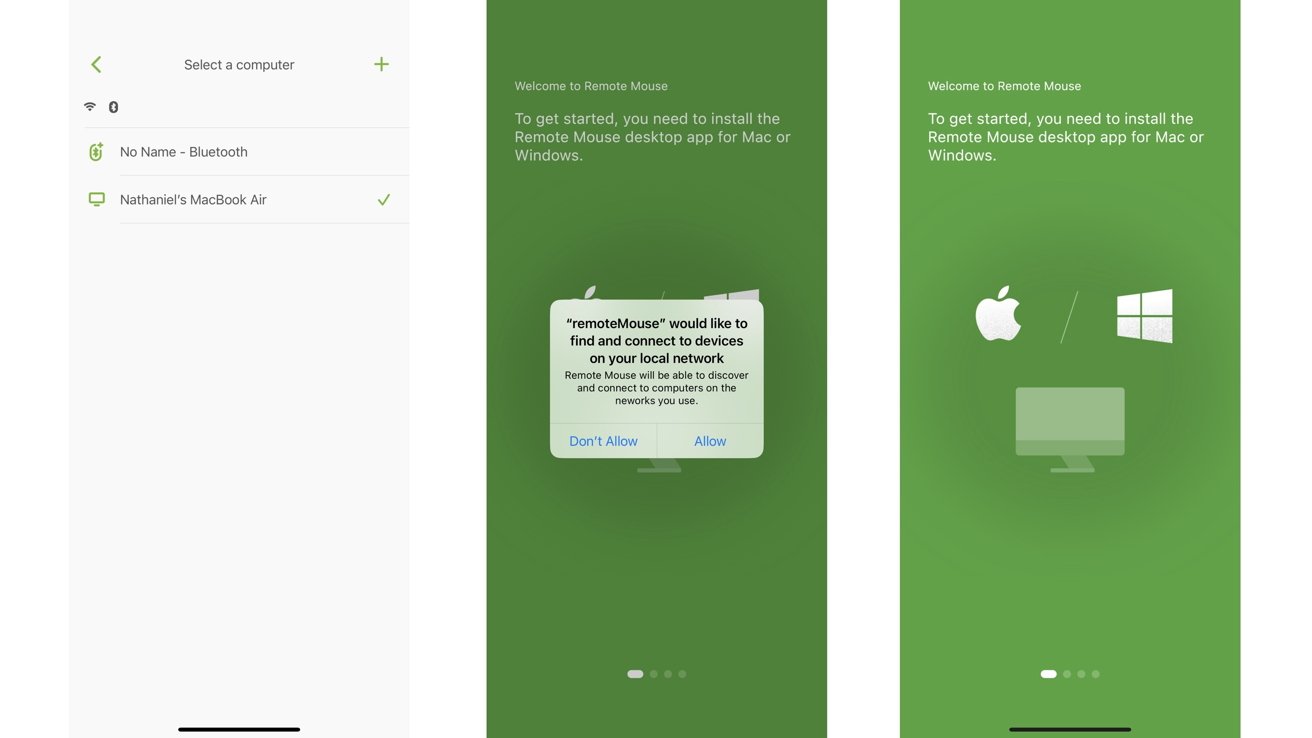
- Once the app is open, two notifications will pop up asking to allow permission
- Allow the app to connect devices via Bluetooth and WiFi
- Once you permit them, you will be able to control your Mac from your iPhone
On your Mac
- Download the "Remote Mouse" app from the Mac App Store
- Launch the app once it has finished downloading
- Once the app is open, you will be guided on how to enable the application in the Accessibility settings
- Once you have allowed the app in the Accessibility settings, click on the app icon in the toolbar and click Auto Start
Once both devices are set up with the app, make sure they are both connected to the same WiFi for the best connectivity.
From here, you can select which device you want to control and start using your iPhone as a wireless mouse for your Mac.
Different ways of connectivity
You can connect your iPhone to your Mac in multiple ways so you can control it wirelessly.
From the "Select a Computer" menu, you will see all of the devices you have already connected and some suggestions for the devices you may want to control. You can store more than one device to control from your iPhone.
You can add other devices through different methods of connectivity on your iPhone and Mac. Here is how you can add other devices to control.
- Go into the Remote Mouse app on your iPhone
- Head over to the "Select a Computer" menu
- Tap on the Plus icon on the top right of the screen
- Select how you would like to add the new device (from previous devices you have added, through an IP address, or through scanning a QR code on the device you want to control)
Connecting a device through either an IP address or a QR code can be found in the same menu on your Mac. You click on the app icon in the toolbar - like you did to set Auto Start - and select either "Show IP address" or "Show QR code".
Selecting "Show IP address" will supply you with eight numbers to type into your iPhone to connect the two devices. Selecting "Show QR Code" will display a QR code on your Mac's screen that you can scan with your iPhone's camera within the Remote Mouse app.
The app must be launched and running on your Mac for your iPhone to be able to find it. To stop the connection, click on the icon on the upper taskbar and select "Quit".
No matter which way you connect your devices, usability will be consistent.
How to use gestures on your iPhone to control your Mac
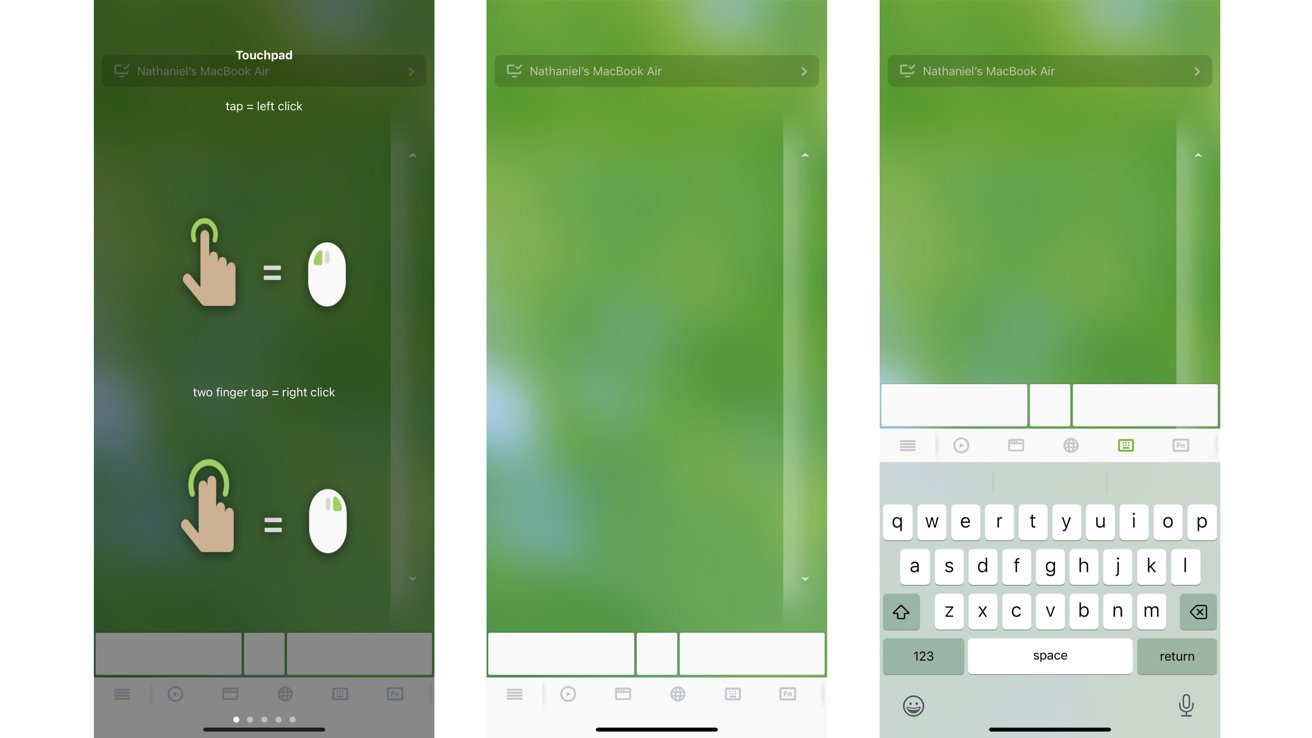
There are many gestures to learn to guide around your Mac from your iPhone, but they are mostly the same as what you would use on the Mac's trackpad.
Here are the most common gestures to learn to get the most out of the wireless experience.
On the right side of your iPhone screen will be a scroll bar. This will make it easier to scroll up and down pages on your Mac.
There are also icons on the bottom of the app's interface. Tapping on each one will bring up controls corresponding with what the icons depicts.
Tapping on the file icon (the third icon on the bottom of the screen from the left) will bring up an array of apps. When connecting the app to your Mac in the initial setup, it takes note of the apps that are in your Dock. This section allows you to tap on an app within the Remote Mouse app and have it launch on your Mac nearly instantly.
Tapping on the keyboard icon (the second icon on the bottom of the screen from the right) will bring up your iPhone's keyboard. From there, you can use your iPhone's keyboard to input and type text to your Mac without using your computer's keyboard.
With these features, you can truly do all the basic gestures that would originally do on your Mac but from the comfort of your iPhone.
Not all features are free
While mostly all of the basic features that you would use to get around your Mac are included in the application and are free, not all features that are showcased and clickable are accessible.
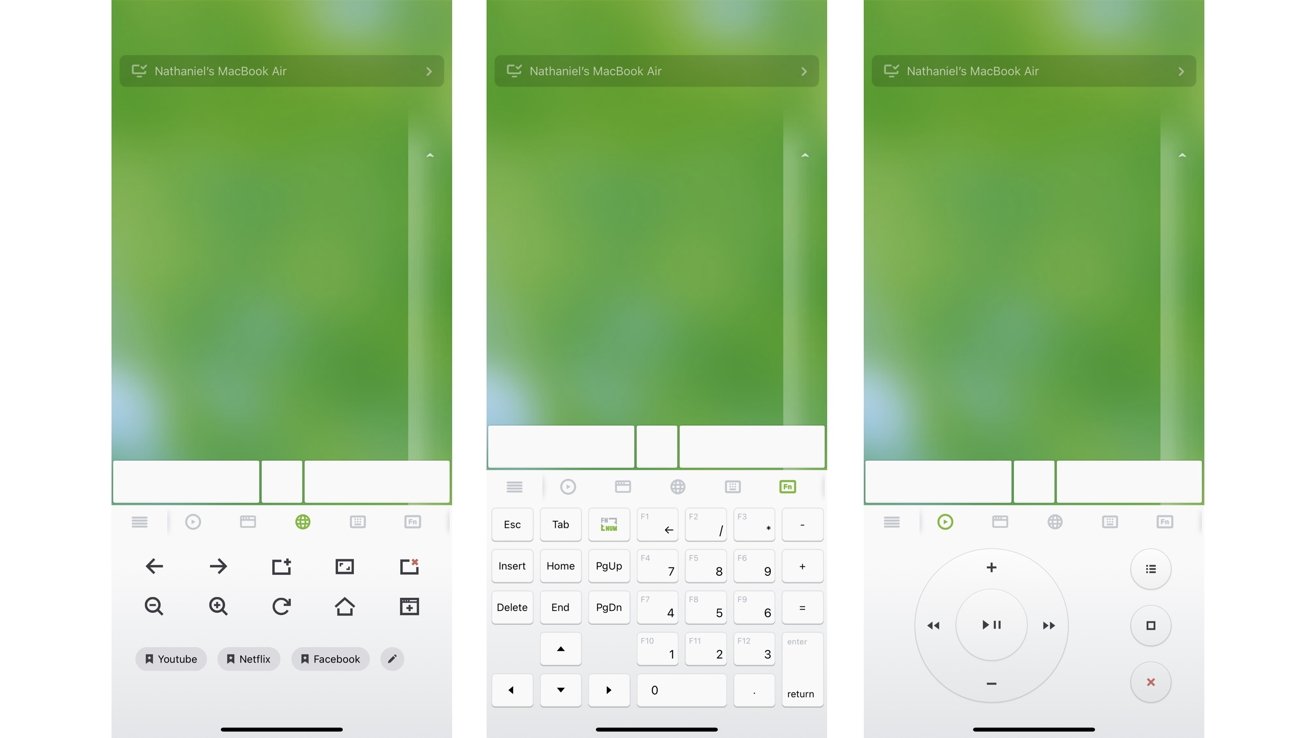
While you can use your iPhone keyboard to type text on your Mac, you cannot use numeric keypad usually found on extended keyboards. Media control also cannot be used without paying a fee.
To use these features, you can pay $1.49 monthly or $13.99 yearly. There is a seven-day free trial before you start paying.
Control from your fingertips
While not seen as a physical-moving mouse and more as a wireless trackpad, using your iPhone to control your Mac has its convenience in being able to control your computer from a device in the palm of your hand.
The app works fairly well for being truly wireless, but does lag sometimes. In our testing, we didn't have a big problem, though. And, if you start using your iPhone as your trackpad and then want to use your Mac trackpad, you can do that.
Both applications on the iPhone and Mac are free and can be done from both devices' App Store. Your iPhone must be running iOS 11 or later, and your Mac must be running macOS Big Sur or later and have an M1 chip or later inside of it.


 Malcolm Owen
 William Gallagher

 Sponsored Content


 Christine McKee